Green Curry Rice Balls Recipe You’ll Love to Make at Home
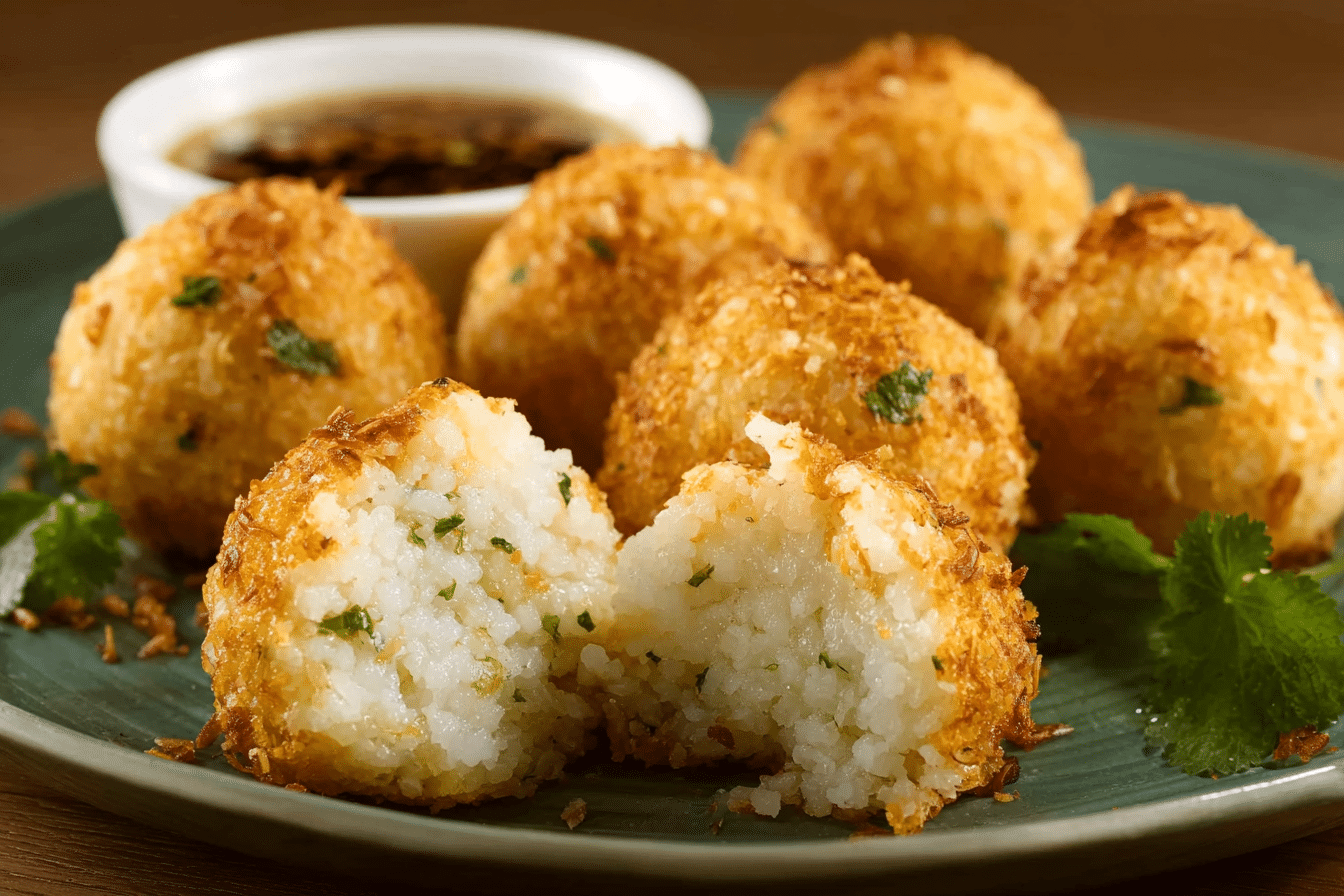
Green Curry Rice Balls are a flavor-packed twist on traditional Asian rice recipes, combining the spicy warmth of Thai green curry with the crispy texture of deep-fried rice balls. This irresistible fusion of textures and bold tastes makes them a must-try for anyone who loves Southeast Asian cuisine with a creative twist.
At Just Thai Recipes, our mission is to make Thai home cooking accessible, fun, and utterly delicious. As shared in our About Page, our story started in a tiny apartment kitchen where authentic flavors met big dreams. Founded by Lina, a Thai food lover turned full-time recipe creator, this blog is a celebration of the dishes that shaped her family meals—like the famous Thai Green Chicken Curry, Crab Fried Rice, and of course, these crispy Green Curry Rice Balls.
Whether you’re a seasoned Thai food fanatic or just discovering the joy of spicy coconut-based dishes, this guide will walk you through everything from the dish’s origin to expert tips on preparing, storing, and reinventing these flavorful rice balls.
Table of Contents
Table of Contents
What Are Green Curry Rice Balls?
Origins of Green Curry Rice Balls in Thai Fusion Cuisine
Green Curry Rice Balls are a unique culinary fusion that marries the principles of two Asian cooking giants—Thailand and Japan. At first glance, they resemble Japanese onigiri or arancini from Italy, but one bite reveals the unmistakable taste of Thai green curry: a spicy, herby, and creamy base made from coconut milk and green curry paste.
The core of the recipe lies in the fusion of authentic Thai curry and sticky jasmine rice, making it a snack that captures the essence of Thai street food with the creativity of modern kitchen innovation. What sets Thai green curry rice balls apart from similar recipes is the use of kaffir lime leaves, Thai basil, and fish sauce, creating a rich aroma and umami depth unmatched by standard rice-based snacks.
Why Green Curry Rice Balls Are Trending Now
In recent years, Thai green curry rice balls have gained popularity on food blogs, TikTok, and YouTube. Why? Because they deliver maximum flavor in minimal bites. They’re crunchy on the outside, soft and creamy inside, and filled with spicy-sweet flavor. They also make perfect party snacks, lunchbox additions, or even vegetarian-friendly appetizers with a few ingredient swaps.
But it’s not just about trendiness. They’re also:
- Portable: Easy to pack and eat on the go.
- Customizable: Swap proteins or make them vegetarian.
- Perfect for Batch Cooking: Make ahead and freeze until you’re ready to fry.
If you’re looking to try something different with your leftover rice or impress guests with a Thai-inspired appetizer, this is it.
Print
Green Curry Rice Balls
- Prep Time: 30 minutes
- Cook Time: 10 minutes
- Total Time: 40 minutes
- Yield: 16 rice balls 1x
- Category: Appetizer
- Method: Deep Frying
- Cuisine: Thai Fusion
- Diet: Halal
Description
These Green Curry Rice Balls are crispy on the outside, creamy and flavorful on the inside. A Thai fusion snack made with coconut milk, green curry, and a mix of sticky and jasmine rice.
Ingredients
- 1/4 cup Thai sticky rice, uncooked
- 3/4 cup jasmine rice, uncooked
- 3/4 cup coconut milk
- 3 tbsp green curry paste (50g)
- 2 tsp fish sauce
- 2 tsp sugar
- 160g ground chicken, turkey, or pork
- 2 tbsp green bell peppers, very finely diced
- 2 tbsp red bell peppers, very finely diced
- 4 kaffir lime leaves, very finely chopped
- 1/2 cup Thai basil
- 1 egg
- 1/3 cup all-purpose flour
- About 1/3 cup water (may need more)
- 1/2 tsp fish sauce (for batter)
- 2 cups panko breadcrumbs
Instructions
- Cook sticky rice and jasmine rice together with 1 cup of water until fully cooked.
- Blend 1/2 cup of coconut milk with Thai basil until smooth.
- In a small pot, bring 1/4 cup of coconut milk to a boil. Add green curry paste and cook until thickened.
- Add fish sauce, sugar, and ground meat. Stir until meat is fully cooked and broken into small pieces.
- Stir in the blended basil-coconut milk mixture and chopped kaffir lime leaves. Bring to a boil and remove from heat.
- While rice is hot, pour curry mixture over it. Add bell peppers and mix until well combined. Let cool to room temperature.
- Form cooled mixture into tight rice balls, about 1.5 to 2 tablespoons each.
- Make batter by mixing flour, egg, water, and fish sauce until smooth and pourable.
- Dip each rice ball into the batter, let excess drip off, then coat in panko breadcrumbs, pressing gently.
- Chill the coated rice balls in the refrigerator for 20 minutes or freeze for later use.
- Fry in oil heated to 350°F (175°C) for about 2 minutes or until golden brown.
Notes
- Use freshly cooked rice for better binding.
- Don’t overcrowd the frying pan to maintain oil temperature.
- Make sure the rice mixture is cool before shaping.
- Freeze coated rice balls for up to 2 months for future frying.
- Reheat fried rice balls in a 375°F oven for 7–10 minutes.
Nutrition
- Serving Size: 2 rice balls
- Calories: 180
- Sugar: 2g
- Sodium: 340mg
- Fat: 9g
- Saturated Fat: 3.5g
- Unsaturated Fat: 4g
- Trans Fat: 0g
- Carbohydrates: 20g
- Fiber: 1g
- Protein: 7g
- Cholesterol: 25mg
Keywords: Green Curry Rice Balls, Thai rice balls, curry rice balls, Thai fusion appetizers, coconut milk snacks, crispy Thai food
Ingredients for Green Curry Rice Balls
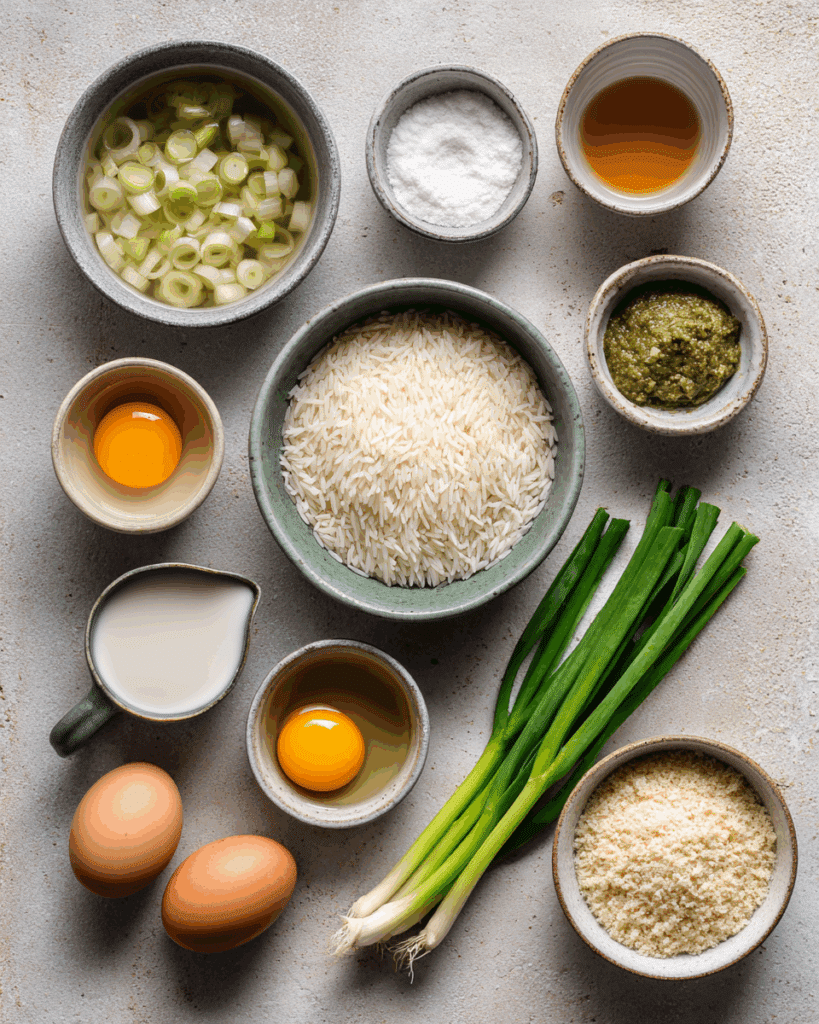
To create the most delicious Green Curry Rice Balls, your ingredients must strike the perfect balance between authenticity, texture, and flavor. Thai cuisine is known for balancing salty, spicy, sweet, and herbal notes—and this dish embodies all of that in a single bite. This section breaks down everything you’ll need for both the filling and the crispy coating.
Thai Ingredients You’ll Need for the Curry Rice Base
These are the stars of the show. Every item plays a key role in building the complexity of Thai green curry and ensuring the rice binds properly into balls.
| Ingredient | Quantity | Purpose |
|---|---|---|
| Thai sticky rice (uncooked) | ¼ cup | Creates stickiness and structure |
| Jasmine rice (uncooked) | ¾ cup | Adds fluffy texture and fragrance |
| Coconut milk | ¾ cup (plus ½ cup blended with basil) | Creamy base for the green curry |
| Green curry paste | 3 tbsp (approx. 50g) | Delivers spice, depth, and aroma |
| Fish sauce | 2 tsp (plus ½ tsp in batter) | Adds salty, umami flavor |
| Sugar | 2 tsp | Balances out the spice and salt |
| Ground chicken, turkey, or pork | 160g | Adds protein and heartiness |
| Green bell pepper (finely diced) | 2 tbsp | Adds freshness and color |
| Red bell pepper (finely diced) | 2 tbsp | Offers sweetness and visual contrast |
| Kaffir lime leaves (finely chopped) | 4 leaves | Essential for authentic Thai aroma |
| Thai basil | ½ cup | Infuses herbaceous, slightly sweet notes |
Why These Ingredients Matter:
The combination of two types of rice—sticky and jasmine—gives you the perfect mix of chewy and aromatic texture. Coconut milk softens and enriches the curry, while kaffir lime leaves and Thai basil add layers of citrus and earthiness that are unmistakably Thai. The green curry paste, with its green chilies, lemongrass, and galangal, is the core that binds all the savory elements.
Discover great ideas like our Crab Fried Rice for other flavorful Thai rice dishes.
Ingredients for Breading and Coating the Rice Balls
Creating that signature crispy exterior requires careful preparation. This is where Japanese and Thai techniques come together.
| Ingredient | Quantity | Function |
|---|---|---|
| Egg | 1 | Helps the batter stick to the rice |
| All-purpose flour | ⅓ cup | Forms the base of the batter |
| Water | About ⅓ cup (adjust as needed) | Thins the batter to the right consistency |
| Fish sauce | ½ tsp | Adds umami to the batter |
| Panko breadcrumbs | 2 cups | Provides a light, crispy finish |
Pro Tip: Always coat your rice balls right before frying for the crunchiest results. If you’re prepping ahead, coat and store in the fridge or freeze for later.
Optional Add-ins for Variation
Want to make your Green Curry Rice Balls vegetarian or add a creative twist? Try these:
- Minced mushrooms instead of ground meat for a plant-based version
- Shredded coconut for a slightly sweet crunch
- Chili flakes for extra heat
- Shredded carrot or zucchini for added veggies
These adjustments make the recipe flexible for various diets and taste preferences.
Don’t miss our colorful Rainbow Rice Salad if you’re craving a lighter rice-based option.
Kitchen Tools You’ll Need
Keep these nearby to make your cooking process smooth:
- Blender (for basil-coconut blend)
- Rice cooker or pot with lid
- Small saucepan (for curry)
- Mixing bowls
- Disher or tablespoon (for portioning)
- Frying pan or deep fryer
- Slotted spoon or mesh strainer (for removing fried balls)
Using the right tools helps prevent frustration and gives consistent results—especially when frying multiple batches.
How to Make Green Curry Rice Balls Step by Step
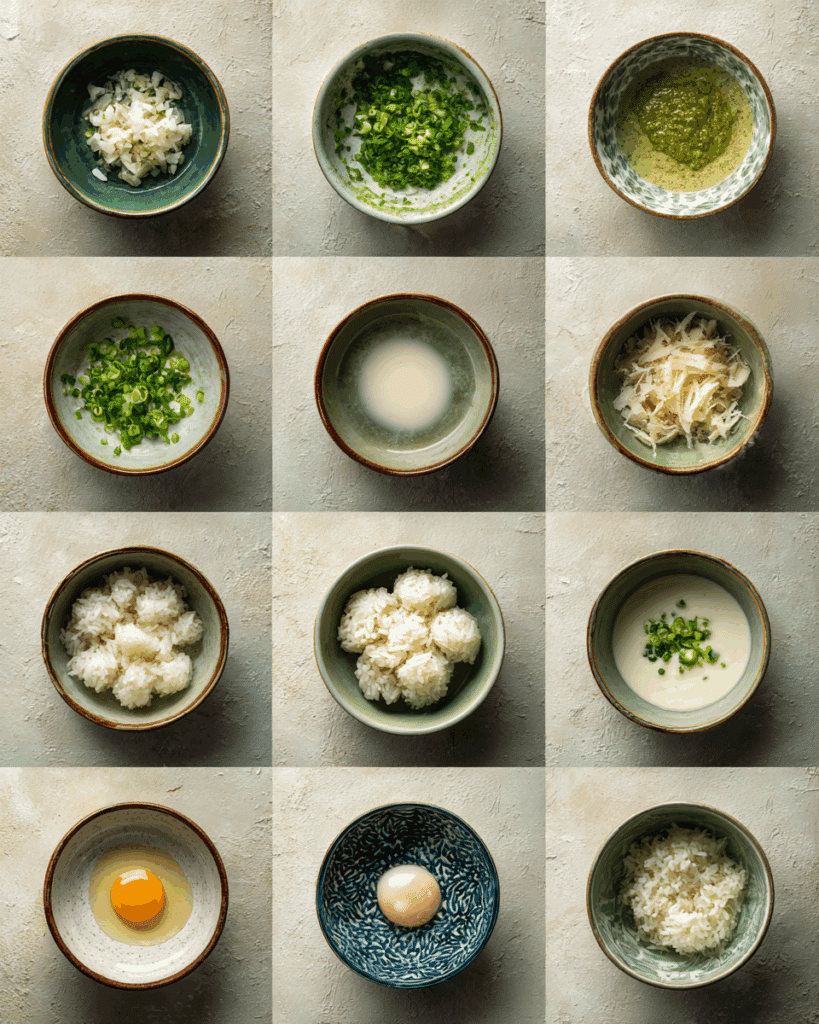
Mastering Green Curry Rice Balls starts with balancing textures and flavors from the very beginning. This part walks you through the complete cooking process—from rice prep to blending Thai herbs—so your curry rice balls turn out perfectly crispy on the outside and lusciously tender inside. Drawing inspiration from real Thai kitchen techniques and trusted recipes, this step-by-step breakdown combines tradition with practical know-how.
Step 1: Cooking the Rice Base
Start by combining your uncooked jasmine rice (¾ cup) and sticky rice (¼ cup). Use a 1:1 water-to-rice ratio, so you’ll need 1 cup of water total. Cook the rice either on the stovetop or in a rice cooker until the grains are fully tender and sticking together. The sticky rice helps the balls hold shape later.
Pro Tip: Don’t rinse the sticky rice too much—you want some of that starch to help with binding.
While the rice is cooking, prep the green curry sauce.
Step 2: Making the Green Curry Paste Mixture
In a blender, combine:
- ½ cup of coconut milk
- ½ cup Thai basil leaves
Blend until smooth. This will be added to the curry later to infuse a fresh, herbal note.
Next, in a saucepan:
- Add ¼ cup coconut milk and bring to a gentle boil
- Stir in 3 tablespoons of Thai green curry paste
Cook for 2–3 minutes until it thickens and becomes fragrant. Then stir in:
- 2 tsp fish sauce
- 2 tsp sugar
- 160g ground chicken (or pork/turkey)
Use a wooden spoon to break up the meat as finely as possible. Large chunks will make shaping the rice balls more difficult. Once the meat is fully cooked, pour in the blended basil-coconut mixture and chopped kaffir lime leaves. Let it simmer for another minute and remove from heat.
Inspired by: The technique used in Hot Thai Kitchen’s recipe, where blending fresh herbs with coconut milk helps preserve their brightness while mellowing the curry paste’s spice.
Step 3: Mixing Curry and Rice Together
Once your rice is done, while it’s still steaming hot, pour the freshly made curry sauce over it. Then immediately mix in:
- 2 tbsp finely chopped green bell pepper
- 2 tbsp finely chopped red bell pepper
Mix thoroughly until the curry is evenly absorbed. You want every grain coated. Then, taste the mixture and adjust with a touch more fish sauce or sugar if needed.
Cooling: Let the mixture rest at room temperature for 15–20 minutes. The mixture must be cool before forming into balls, or it will fall apart.
Step 4: Forming the Rice Balls
Once cool, use a disher or spoon to scoop out 1½ to 2 tablespoons of the mixture. Form into firm, tight balls using your hands.
Shaping Tips:
- If the mix sticks to your hands, lightly oil your palms.
- Pack them tight. The tighter they are, the better they’ll hold during frying.
- Avoid making them too small—smaller balls are harder to shape and more likely to fall apart when frying.
This shaping technique is mirrored in Three Big Bites’ take on Thai green curry rice balls, where they recommend a medium-sized shape for optimal frying and texture.
Step 5: Making the Batter and Coating the Balls
In one bowl, mix:
- ⅓ cup all-purpose flour
- ½ tsp fish sauce
- 1 beaten egg
- ⅓ cup water (add more if the batter is too thick)
Whisk until smooth and pourable—similar to a pancake batter consistency.
In a separate bowl, add 2 cups of panko breadcrumbs.
Now, coat each rice ball:
- Dip into the batter
- Let excess drip off
- Roll in panko and gently press to stick
This triple-coating technique gives a golden, shatteringly crispy shell.
Similar to: Lion Brand’s crispy curry rice balls method, where panko gives a distinct airy crunch, unlike regular breadcrumbs.
Step 6: Ready to Fry or Freeze
At this point, your green curry rice balls can be:
- Fried immediately
- Refrigerated for up to 24 hours
- Frozen for up to 2 months
If freezing, place the breaded rice balls in a single layer on a baking tray, freeze solid, then transfer to an airtight container. When ready to serve, you can fry them straight from frozen—just add an extra minute or so to the cooking time.
Combining Curry and Rice
The magic of Green Curry Rice Balls begins in this step, where warm, sticky rice meets fragrant Thai green curry. Getting this part right is key to ensuring that your rice balls hold their shape, pack flavor into every bite, and fry up with a perfect texture inside. The curry needs to be fully infused into the rice, yet not so wet that the mixture turns soggy. It’s all about balance.
Why Mixing While Hot Matters
One of the most crucial steps in this recipe is mixing the curry into the rice while both are still hot. Why? Hot rice is more pliable and absorbent, and it soaks up flavors faster and more evenly. The steam opens up the starches in the sticky and jasmine rice blend, allowing the green curry mixture to bind and season every grain.
To do this properly:
- Pour the freshly prepared green curry meat mixture directly over the cooked rice while it’s still warm.
- Add in the finely diced red and green bell peppers at this stage for a fresh crunch and visual pop.
- Use a large wooden spoon or silicone spatula to fold everything together—pressing down slightly as you stir to help break down any clumps.
Tip: If your curry is a bit watery, let it simmer uncovered for an extra minute or two before mixing into the rice to thicken it. You want a moist mixture—not wet.
Getting the Right Texture for Rolling
After mixing, the rice will be warm, soft, and fragrant—but not ready for shaping yet. The mixture must cool to room temperature before forming balls. If shaped too early, the steam will loosen the structure, and your rice balls may fall apart in the frying oil.
Here’s how to speed up the cooling process:
- Spread the mixture on a large tray or shallow pan to cool evenly.
- Let it rest for 15–20 minutes at room temperature.
- Avoid refrigerating at this point, as cold rice can harden and dry out too much.
As the rice cools, it will firm up naturally while locking in the rich green curry flavor. The mixture should feel slightly sticky but moldable—like playdough with a bit of give.
Troubleshooting Texture:
- Too sticky? Add a small sprinkle of panko and mix it in to absorb excess moisture.
- Too dry? Add a tablespoon of coconut milk and stir gently to rehydrate.
How to Check if It’s Ready
Scoop out a small amount and press it into a ball in your palm. If it holds together without cracking or crumbling, it’s ready for the next step. The combination of sticky rice starch, creamy coconut curry, and ground meat should create a soft yet moldable base.
At this stage, you should have a savory, fragrant, and cohesive rice blend that’s packed with basil, kaffir lime, curry, and bell pepper aromas. Each spoonful should taste just as good as the final product will.
Breading Like a Pro
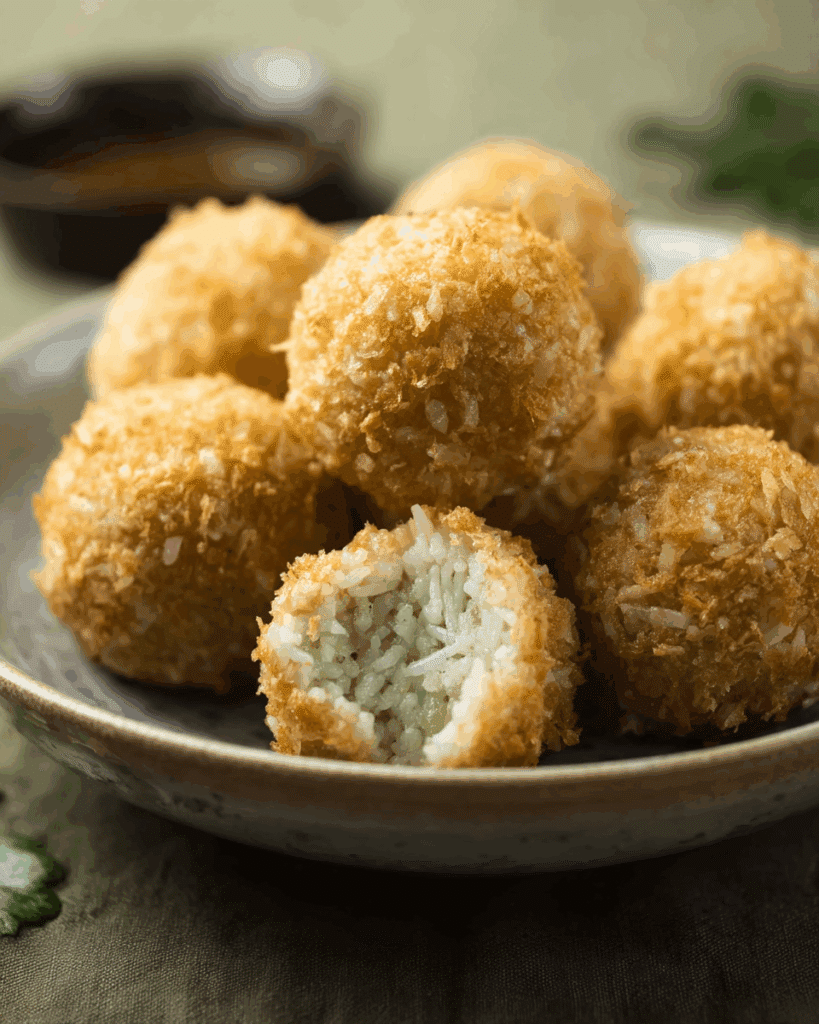
Breading is what transforms your green curry rice balls from a soft, savory bite into a crispy, golden delight. It’s not just about coating—this step gives structure, seals in moisture, and delivers that addictive crunch when you bite in. Proper breading ensures your rice balls survive the frying process without breaking apart and come out with a beautiful texture.
The Ideal Batter: Smooth and Flavorful
Start by preparing a simple yet effective batter that will help the panko stick and crisp up perfectly during frying. Here’s how to do it:
In a bowl, whisk together:
- ⅓ cup all-purpose flour
- 1 egg (beaten)
- About ⅓ cup water (adjust as needed)
- ½ teaspoon fish sauce
Your goal is to create a smooth, lump-free batter that’s thin enough to pour but thick enough to cling to each rice ball. If the batter seems too thick and gunky, add a splash more water. If it’s too thin and runs off the ball, whisk in a little more flour.
Consistency Check: The batter should drip slowly from a spoon and coat the back without immediately sliding off.
The fish sauce adds umami depth, enhancing the Thai flavor all the way through to the crust.
Panko: Your Secret to Ultimate Crispiness
In a second bowl, add 2 cups of panko breadcrumbs. Panko is lighter and crunchier than regular breadcrumbs, creating a shatteringly crisp texture when fried.
If you’re preparing rice balls in large batches, replenish the panko bowl regularly—flattened or damp panko won’t deliver the same crunch.
Optional Boosts: Add a pinch of salt or Thai chili flakes to the panko if you want an extra kick.
Step-by-Step Breading Process
Now it’s time to coat each rice ball, one at a time. Here’s how to do it without creating a sticky mess:
- Dip the rice ball into the batter and roll it gently to ensure it’s fully covered.
- Lift it out and let the excess drip off. Gently tap it on the edge of the bowl to remove clumps.
- Place it in the bowl of panko and roll it around.
- Press the crumbs onto the rice ball using your fingertips to ensure an even, compact coating.
Repeat for each rice ball. Set the finished ones aside on a plate or tray.
Tips for Success:
- Use one hand for the wet batter and the other for the dry panko to avoid clumping your fingers.
- Don’t over-coat—just enough batter and breadcrumbs to cover evenly without over-thickening the crust.
- If the panko isn’t sticking well, the batter may be too thin—adjust accordingly.
Chill Before Frying
Once all the rice balls are breaded, let them rest in the refrigerator for at least 15–20 minutes. This step is essential because:
- It firms them up, making them less likely to fall apart in hot oil.
- It helps the panko bond tightly, reducing crumbs in the frying pan.
If you’re planning ahead, you can refrigerate the breaded rice balls for up to 24 hours or freeze them for longer storage.
Freezing Tip: Lay the coated balls in a single layer on a tray until frozen solid, then transfer to a zip-top bag. This prevents sticking and preserves their shape.
Once they’re chilled and ready, it’s time for the fun part—frying them to golden perfection.
Frying and Serving
This is where all your preparation comes to life. Frying Green Curry Rice Balls turns them into golden, crispy spheres bursting with spicy Thai flavor and rich, creamy coconut goodness. To get that ideal crunchy texture while keeping the inside moist and flavorful, you’ll need the right oil temperature, timing, and setup.
Best Practices for Frying Rice Balls
Start by selecting a neutral oil with a high smoke point. Canola, vegetable, or peanut oil work well. You’ll need enough oil to fully submerge each rice ball or at least come halfway up their sides if pan-frying.
Instructions for Deep Frying:
- Heat the oil to 350°F (175°C) using a thermometer. Maintaining this temperature is key. Too hot and the crust burns before the inside heats through; too cold and the balls absorb too much oil.
- Carefully lower 3–4 rice balls into the oil at a time. Don’t overcrowd the pan—this drops the temperature and leads to uneven frying.
- Fry for about 2 minutes, turning occasionally until they’re golden brown all over.
- Use a slotted spoon or mesh strainer to remove and transfer them to a paper towel-lined tray or wire rack to drain excess oil.
If pan-frying instead:
- Use enough oil to cover the rice balls halfway and rotate them gently for even browning.
- Slightly lower the heat to medium once the exterior begins to crisp.
Signs they’re done:
- The crust is deep golden and feels firm to the touch.
- Tiny bubbles slow down around each ball as moisture escapes.
Serving Without a Sauce? Yes, Really
Thanks to the punchy green curry filling, you don’t need to serve these rice balls with any dipping sauce. They’re already layered with salty, sweet, spicy, and herbal flavors in every bite. However, if you like, a side of Thai sweet chili sauce or sriracha-mayo wouldn’t hurt for added variety.
Presentation Ideas:
- Serve on a banana leaf or dark plate for a dramatic contrast.
- Garnish with a few Thai basil leaves or chopped red chili slices.
- Offer skewers or toothpicks if serving as party appetizers.
These crispy rice balls are perfect for sharing at gatherings, family dinners, or even packed lunches. They’re flavorful at room temperature, but best enjoyed fresh out of the fryer when they’re hot and crunchy.
Pro Tips for Perfect Texture and Flavor
- Don’t skip the resting time in the fridge before frying. It helps the balls stay firm and prevents explosions in hot oil.
- Use freshly cooked rice for the best binding. Old, cold rice tends to break apart when mixing with curry.
- Always test-fry one ball first. This lets you check the temperature, flavor, and timing before committing the whole batch.
With every bite, you’ll taste the brightness of Thai basil, the heat of green curry, and the richness of coconut milk—all held together in a crisp, golden shell.
Making Vegetarian Green Curry Rice Balls
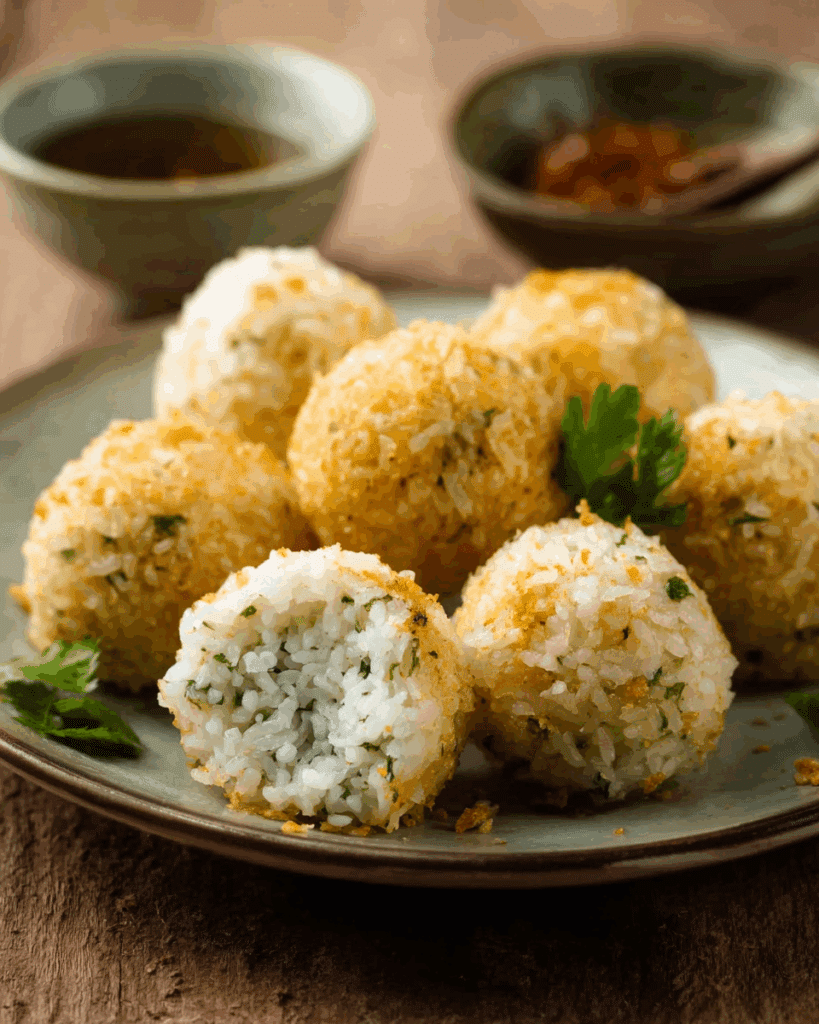
One of the most amazing things about Green Curry Rice Balls is their adaptability. Whether you’re vegetarian, reducing your meat intake, or cooking for someone with dietary restrictions, this dish can be just as flavorful and satisfying—without using any animal products. Thai cuisine is rich in herbs, spices, and umami ingredients that make going meatless both exciting and delicious.
Swapping Out the Meat
The original recipe uses ground chicken, turkey, or pork for richness and protein. To make a vegetarian version, you’ll want to replicate the same texture and savory depth. The best meat substitutes for this dish are:
- Crumbled tofu: Use firm tofu, press it to remove moisture, and crumble it into small pieces. It absorbs flavor beautifully.
- Finely diced mushrooms: Shiitake, oyster, or cremini mushrooms add an earthy, umami flavor similar to meat.
- Textured vegetable protein (TVP): When rehydrated and seasoned well, TVP mimics ground meat and works perfectly in rice-based dishes.
- Plant-based meat crumbles: Many brands now offer meatless grounds that work just like real meat in stir-fries and curries.
Choose one or combine a couple for the best results. Cook your selected substitute just like the ground meat in the original curry mixture—sauté with curry paste, fish sauce alternative, sugar, and basil-infused coconut milk.
Veganizing the Curry Paste and Batter
Many commercial Thai curry pastes include shrimp paste or fish sauce, making them unsuitable for strict vegetarians and vegans. Here’s what to do:
- Look for vegetarian Thai green curry paste: Check the label to ensure there’s no fish or seafood component.
- Make your own paste: Blend green chilies, garlic, shallots, lemongrass, galangal, kaffir lime zest, and salt. This allows full control over the ingredients.
- Use soy sauce or tamari instead of fish sauce in both the curry and batter. For even more complexity, try mushroom soy sauce or a dash of miso paste.
In the batter:
- Replace the egg with a flaxseed mixture (1 tbsp ground flax + 3 tbsp water) or just increase the flour slightly and add a bit more water to create the same consistency.
Maintaining Flavor Without Meat
To make up for the flavor meat usually brings, it’s important to layer umami and spices:
- Use full-fat coconut milk for richness.
- Add a pinch of white pepper or a small dash of soy sauce to the rice mixture for deeper flavor.
- Stir in minced garlic or shallots when cooking your tofu or mushrooms for extra aroma.
Tips for Vegetarians and Vegans
- Always double-check your panko breadcrumbs to make sure they don’t contain dairy or eggs. Most are vegan, but some may not be.
- Use a neutral oil for frying to avoid any animal-fat-based oils if following a strict vegan diet.
- Make sure all ingredients like sugar are vegan-certified if necessary (some refined sugars use bone char in processing).
Whether you’re preparing for Meatless Monday or cooking for a fully vegetarian household, these plant-based green curry rice balls are every bit as crispy, spicy, and satisfying as the original version. They’re proof that meatless meals can still pack a bold punch of Thai flavor.
Storage, Freezing & Reheating
When you go through the effort of making Green Curry Rice Balls from scratch, it’s smart to make a big batch and store some for later. These rice balls are perfect for meal prepping, quick lunches, or party snacks that can be reheated in just a few minutes. In this section, you’ll learn how to properly store, freeze, and reheat Green Curry Rice Balls while keeping their signature texture and flavor intact.
Storing Green Curry Rice Balls in the Fridge
If you’re planning to enjoy your Green Curry Rice Balls within the next day or two, refrigeration is your best option. After forming and breading the rice balls—but before frying—place them on a tray lined with parchment paper. Leave space between each ball to prevent sticking.
Refrigeration Tips:
- Cover the tray loosely with plastic wrap or foil.
- Store for up to 24 hours before frying.
- If already fried, let them cool completely before refrigerating. Store in an airtight container lined with a paper towel to absorb excess moisture.
Chilling before frying actually helps the Green Curry Rice Balls firm up, making them less likely to fall apart when they hit the hot oil.
Freezing Green Curry Rice Balls for Later
To freeze Green Curry Rice Balls, follow these steps:
- Bread them completely (after shaping and coating with batter and panko).
- Place them in a single layer on a baking sheet lined with parchment paper.
- Freeze for 3–4 hours, or until solid.
- Transfer to a zip-top freezer bag or airtight container for long-term storage.
Freezing Notes:
- Green Curry Rice Balls can be frozen for up to 2 months without losing flavor.
- Label the bag with the date so you can keep track.
- Do not thaw before frying. Fry them directly from frozen to keep the crust from becoming soggy.
Freezing also makes it easy to prep large batches ahead of time for parties or special occasions.
Reheating Fried Green Curry Rice Balls
Already fried and have leftovers? You can still enjoy them with almost the same crunch by reheating the right way.
Oven Method (Best for Crispiness):
- Preheat your oven to 375°F (190°C).
- Place rice balls on a baking tray.
- Bake for 7–10 minutes, depending on the size, until heated through and the crust is re-crisped.
Air Fryer Method:
- Preheat air fryer to 350°F (175°C).
- Air fry for 4–5 minutes, shaking the basket halfway through.
Avoid Microwaving:
While convenient, microwaving Green Curry Rice Balls can make them soggy and rubbery. If you’re in a hurry, use a microwave only to heat the center, then finish in a hot pan or oven to restore the outer crisp.
Signs of Freshness
You’ll know your Green Curry Rice Balls are still good if:
- The crust is golden and crispy after reheating.
- The inside smells fresh—herbal, spicy, and coconut-sweet.
- The texture is soft and moist, not dry or crumbly.
If they smell off or feel slimy, it’s best to discard them.
Green Curry Rice Balls are not just meant to be eaten fresh out of the fryer—they’re also perfect for making ahead, saving time, and enjoying throughout the week. Whether you’re meal prepping or freezing them for a future event, following the right storage and reheating steps ensures they stay just as flavorful and crisp.
Pro Tips and Flavor Variations
By now, you’ve mastered the core steps to making authentic, crispy, and satisfying Green Curry Rice Balls. But what if you want to take things to the next level? Whether you’re after bolder heat, new textures, or a surprising twist, this final section is packed with chef-approved tips and creative ideas to elevate your Green Curry Rice Balls even further.
Pro Tips for the Perfect Green Curry Rice Balls
Every detail matters when crafting these delicious bites. These expert tips will help you get the most flavor, best texture, and beautiful presentation every time.
1. Use freshly made curry
For maximum aroma and flavor, prepare the green curry just before mixing it into the hot rice. The freshness of Thai basil, kaffir lime, and coconut milk is what makes Green Curry Rice Balls truly stand out.
2. Shape with precision
Compact rice balls are key. Make sure each ball is firmly packed to avoid cracking or falling apart while frying. Slightly damp hands or oiled palms help reduce sticking.
3. Test one before frying a batch
Before frying a whole batch, test one Green Curry Rice Ball. This helps you fine-tune the oil temperature and adjust seasoning if necessary.
4. Maintain consistent size
Uniform size ensures even frying. Use a small cookie scoop or two heaping tablespoons for consistency.
5. Let them rest after coating
Chill the breaded balls for at least 20 minutes before frying. This prevents them from breaking in the hot oil and results in a more stable, crisp crust.
Flavor Variations to Customize Your Green Curry Rice Balls
The beauty of Green Curry Rice Balls lies in their versatility. With a few tweaks, you can customize them for different occasions, spice levels, and dietary needs.
1. Spicy Green Curry Rice Balls
Love heat? Add chopped Thai bird’s eye chilies into the curry mixture or a dash of extra green curry paste. Serve with a spicy sriracha dip for a fiery bite.
2. Coconut-lovers version
Boost the coconut flavor by mixing in a tablespoon of unsweetened shredded coconut into the rice mix. It adds subtle sweetness and texture to each bite.
3. Vegetarian and Vegan Green Curry Rice Balls
Use tofu or mushrooms in place of ground meat and ensure your curry paste is vegetarian-friendly. Replace egg in the batter with a flax or chickpea flour alternative for a 100% plant-based result.
4. Crunchy crust twist
Mix crushed rice crackers or crushed cornflakes into the panko for an ultra-crispy coating. This adds a unique crunch that pairs well with the soft, flavorful interior.
5. Stuffed Green Curry Rice Balls
Make it fancy by stuffing a tiny cube of mozzarella or plant-based cheese in the center before shaping. It creates a gooey middle that contrasts perfectly with the spicy rice.
6. Japanese-style fusion
Add a touch of miso paste or use Japanese curry in place of Thai curry paste for a softer, sweeter profile. This variation still uses the same cooking and breading method but brings in a different regional flavor.
7. Sweet & Savory Balance
A pinch of palm sugar or brown sugar in the curry mix adds an earthy sweetness that balances out the heat of the green curry. This is especially helpful for those new to spicy food.
Serving Inspiration for Green Curry Rice Balls
Green Curry Rice Balls can be served in countless ways:
- As an appetizer at dinner parties, served on skewers or arranged on a platter.
- In bento-style lunch boxes with a side of pickled vegetables or fresh herbs.
- At potlucks or family gatherings, where they can be kept warm in the oven and served with minimal fuss.
- As a late-night snack, dipped in chili-lime mayo or simply enjoyed plain thanks to their bold flavor.
Bonus Tip: If you’re making Green Curry Rice Balls for guests, garnish the platter with fresh Thai basil leaves and sliced red chilies for a pop of color and aroma.
Green Curry Rice Balls are more than just a snack—they’re a canvas for flavor, culture, and creativity. Once you’ve mastered the basic recipe, these variations and techniques will keep your cooking exciting and your taste buds curious.
Conclusion and Final Thoughts on Green Curry Rice Balls
If you’re looking to add something bold, creative, and downright delicious to your cooking routine, Green Curry Rice Balls are the perfect dish. They combine everything people love about Thai cuisine—spice, herbs, coconut richness, and texture—into compact, crave-worthy bites.
From the very first step of simmering Thai green curry paste in creamy coconut milk to the final golden crisp after frying, Green Curry Rice Balls offer a rewarding cooking experience that’s just as fun as it is satisfying. Whether you make them as party appetizers, savory snacks, or an exciting main course, these rice balls bring flavor and crunch in every bite.
Not only are Green Curry Rice Balls bursting with flavor, they’re also incredibly versatile:
- They can be made vegetarian or vegan without sacrificing taste.
- You can prepare them ahead of time and store or freeze them easily.
- They’re kid-friendly, guest-approved, and adaptable to your spice tolerance.
Throughout this guide, we’ve covered everything from selecting the right rice, creating a perfectly balanced curry, breading techniques, and frying tips, to freezer hacks and reheating methods. You now have all the tools to master Green Curry Rice Balls at home like a pro.
And let’s not forget the variations. Whether you’re making spicy versions with Thai chilies, coconut-enhanced bites with shredded coconut, or fusion twists using Japanese curry, there’s no limit to what you can do with the basic Green Curry Rice Balls formula. It’s an endlessly customizable dish that rewards experimentation.
So next time you’re craving something crispy, comforting, and flavor-packed, skip the takeout and roll up a batch of Green Curry Rice Balls. They’ll impress your guests, satisfy your cravings, and introduce you to the vibrant world of Thai fusion cooking—all in one bite.
Get creative, trust the process, and most importantly—don’t forget to make extra. One serving of Green Curry Rice Balls is never enough.
Ready to make your own batch of Green Curry Rice Balls? Let your kitchen smell like Thai street markets, and let your taste buds experience something unforgettable.
FAQ Section and Answers
Can I make vegetarian or vegan Green Curry Rice Balls?
Absolutely. Green Curry Rice Balls are extremely versatile and easy to adapt for plant-based diets. To make a vegetarian version:
Replace the ground meat with tofu, mushrooms, or a vegan meat alternative
Use a vegetarian or vegan green curry paste (free of fish sauce or shrimp paste)
Swap the egg in the batter for a flaxseed egg or a bit of chickpea flour and water
Use a plant-based fish sauce substitute like mushroom soy sauce or tamari for added depth
Even without meat or fish sauce, your Green Curry Rice Balls will remain packed with flavor, thanks to the curry paste, coconut milk, Thai basil, and kaffir lime leaves.
Are Green Curry Rice Balls gluten-free?
Green Curry Rice Balls can be made gluten-free with just a few ingredient swaps. Here’s how:
Use gluten-free panko or crushed rice crackers for the coating
Replace all-purpose flour in the batter with rice flour or chickpea flour
Double-check your green curry paste and soy sauce (if substituting fish sauce) to ensure they don’t contain wheat-based thickeners or additives
With these changes, the dish becomes safe for those with gluten sensitivities or celiac disease while retaining its crispy texture and bold Thai flavor.
Can I bake Green Curry Rice Balls instead of frying them?
Yes, you can bake Green Curry Rice Balls, but note that the result won’t be quite as crispy as deep-frying. Baking is a healthier option and still gives you good results with less oil.
To bake:
Preheat the oven to 400°F (200°C)
Place the breaded rice balls on a parchment-lined baking tray
Lightly spray or brush them with oil
Bake for 15–18 minutes, flipping once halfway through
The crust won’t be as golden as the fried version, but the inside will still be flavorful and moist.
What rice is best for Green Curry Rice Balls?
The best rice for Green Curry Rice Balls is a combination of Thai sticky rice and jasmine rice. Sticky rice provides the tackiness needed to hold the balls together, while jasmine rice adds aromatic fluffiness and a tender bite. This dual-rice blend creates the perfect balance between structure and flavor.
Avoid using long-grain rice or plain white rice on its own—they won’t have the stickiness required to form compact rice balls that hold their shape during frying.

