
Agar Jelly Fruit Cake: How to Make This Tropical Delight
Agar Jelly Fruit Cake is not just a dessert it’s a celebration of tropical colors, flavors, and textures beautifully layered into a refreshing treat. Whether you’re hosting a summer gathering or simply want a light dessert that’s both healthy and beautiful, this jelly cake is your answer. It’s dairy-free, gluten-free, and uses plant-based agar agar instead of animal gelatin, making it suitable for a wide range of dietary preferences.
At Just Thai Recipes, every dish comes with a story. My name is Lina, and my partner and I founded this blog with one mission to bring the bold and beautiful flavors of Thai cooking into every kitchen around the world. Our About page shares how our journey started, blending our love for home-cooked Thai meals with a desire to make them accessible, easy, and inspiring for everyone.
We believe food should spark joy and connect people and this Agar Jelly Fruit Cake does exactly that. It’s a conversation starter, a healthy indulgence, and a taste of Thailand all rolled into one.
In this comprehensive guide, you’ll discover exactly how to make this eye-catching and delicious dessert step-by-step, along with helpful tips to avoid common mistakes and ensure your cake sets perfectly. We’ll explore each layer: the fruit, the coconut, and the juice, and show you how they come together to create a show-stopping masterpiece.
Table of Contents
Table of Contents
What Is Agar Jelly Fruit Cake?
What makes agar jelly fruit cake unique
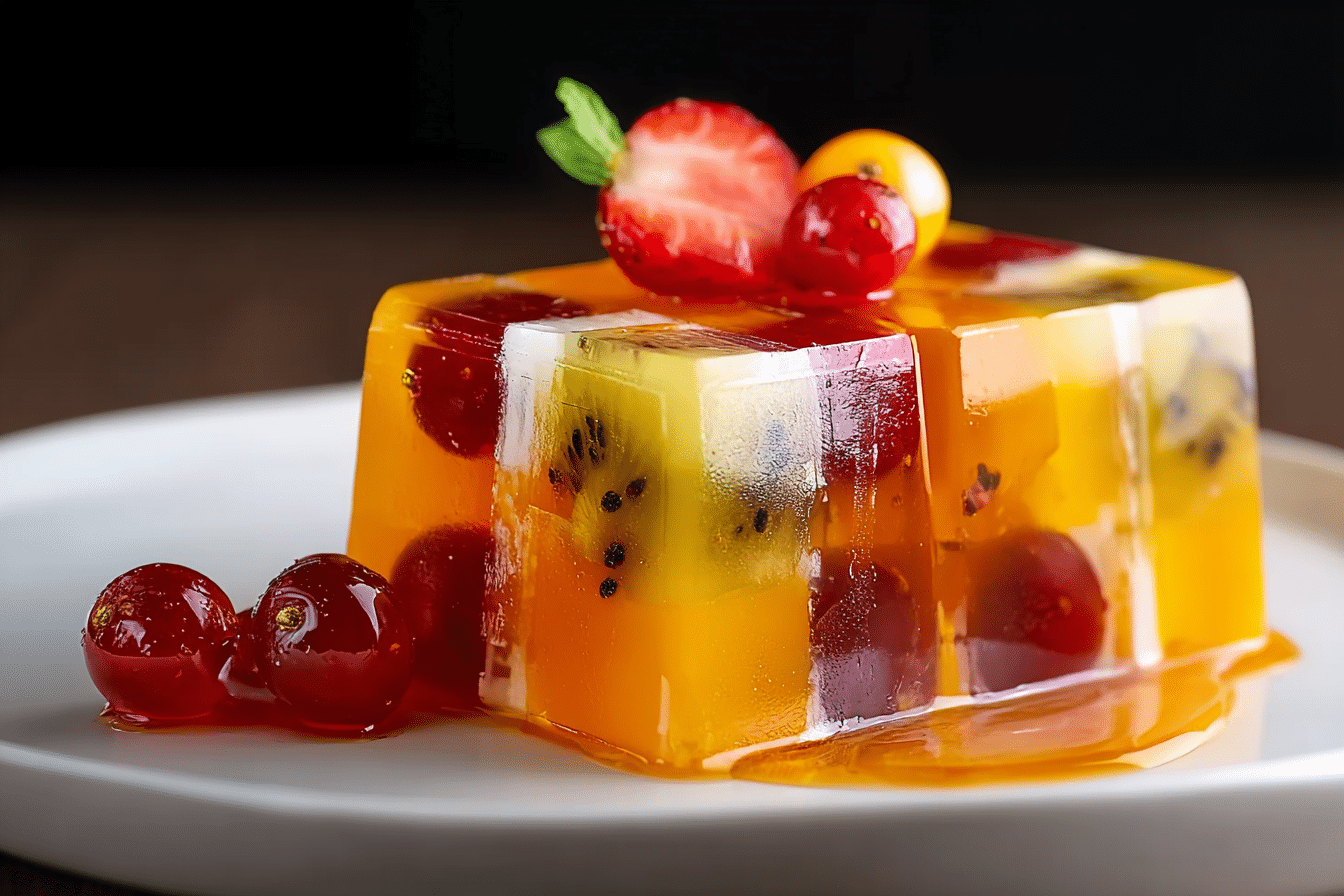
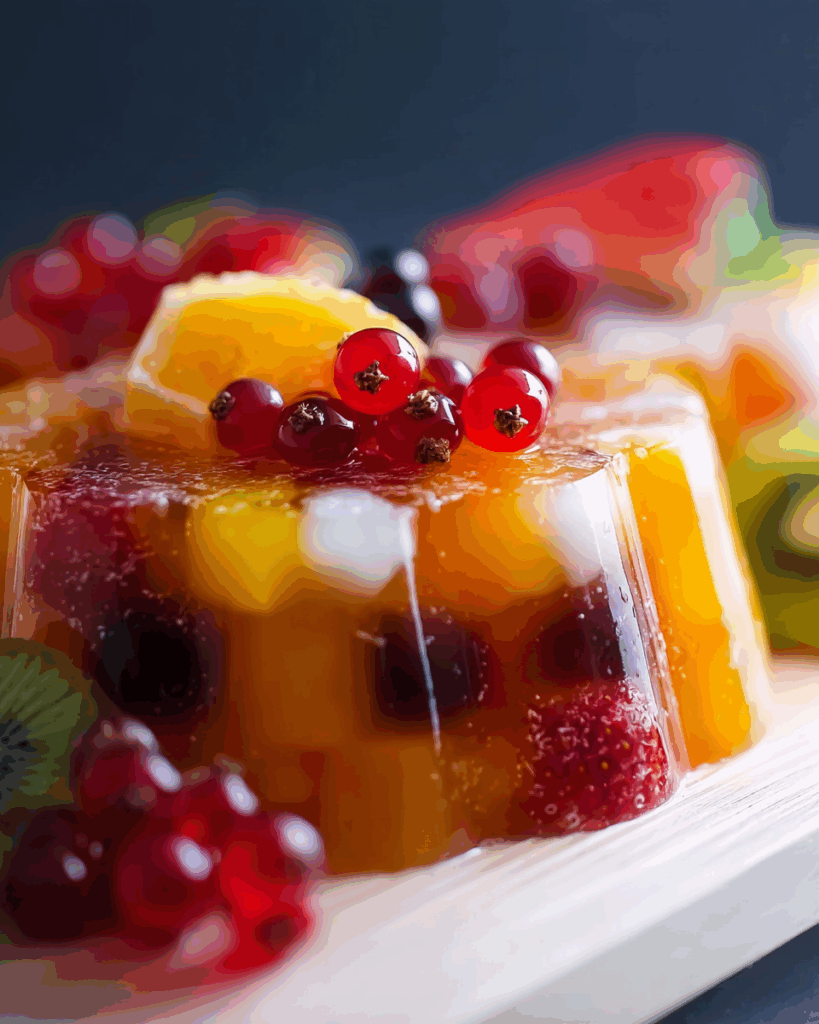
The Agar Jelly Fruit Cake is a layered, no-bake dessert made with agar agar powder as the gelling agent. Unlike cakes that use flour or eggs, this cake is structured through agar agar’s ability to set liquids into firm, sliceable layers. It’s often served chilled and features suspended pieces of fresh tropical fruit, a creamy coconut milk layer, and a contrasting bottom layer made with fruit juice.
What sets it apart is the texture—it’s firm yet delicate, almost like glass that melts in your mouth. The vibrant colors of the fruit are clearly visible through the transparent jelly, making it one of the most visually appealing desserts you’ll ever make.
Each spoonful offers a new experience: the tang of fresh mango, the floral sweetness of lychee, the creaminess of coconut, and the refreshing bite of papaya or kiwi. The layering adds a stunning dimension that looks complex but is surprisingly easy once you understand the technique.
Difference between agar agar cake and gelatin desserts
While many people confuse agar jelly cakes with gelatin-based desserts, there are critical differences that affect flavor, texture, and even who can eat them.
Key Differences Between Agar Agar and Gelatin:
| Feature | Agar Agar | Gelatin |
|---|---|---|
| Source | Seaweed (Plant-based) | Animal collagen |
| Dietary Use | Vegan & vegetarian-friendly | Not suitable for vegans |
| Texture | Firm, clean cut | Wobbly, soft |
| Setting Speed | Sets at room temperature | Needs refrigeration |
| Melting Point | Holds in warm temps | Melts easily in heat |
This makes agar agar the preferred choice in Thai desserts and Southeast Asian cuisine. It sets quickly, has a clean break when sliced, and holds up well at room temperature—ideal for picnics, potlucks, or any celebration where refrigeration may not be consistent.
Moreover, agar agar allows you to control transparency and texture more precisely. When used correctly, it forms a flawless clear gel that showcases the fruits inside like a stained glass window.
In this recipe, we’re using three distinct layers:
- A fruit-studded layer using lychee juice and water
- A creamy coconut layer that adds richness
- A juice layer that offers a flavor contrast and completes the structure
All of this makes the Agar Jelly Fruit Cake not just a dessert but a piece of edible art.
Print
Agar Jelly Fruit Cake
- Prep Time: 20 mins
- Cook Time: 30 mins
- Total Time: 2 hrs 50 mins
- Yield: 1 8-inch cake 1x
- Category: Dessert
- Method: No-bake
- Cuisine: Thai
- Diet: Vegan
Description
A vibrant and refreshing Thai-inspired dessert made with layers of fresh fruit, coconut milk, and fruit juice, all set with agar agar. Vegan, gluten-free, and perfect for warm weather occasions.
Ingredients
- 1⅓ cups water
- ⅔ cup juice from canned lychee (reserve lychee fruit)
- ¼ cup sugar (for fruit layer)
- 1¾ teaspoons agar agar powder (for fruit layer)
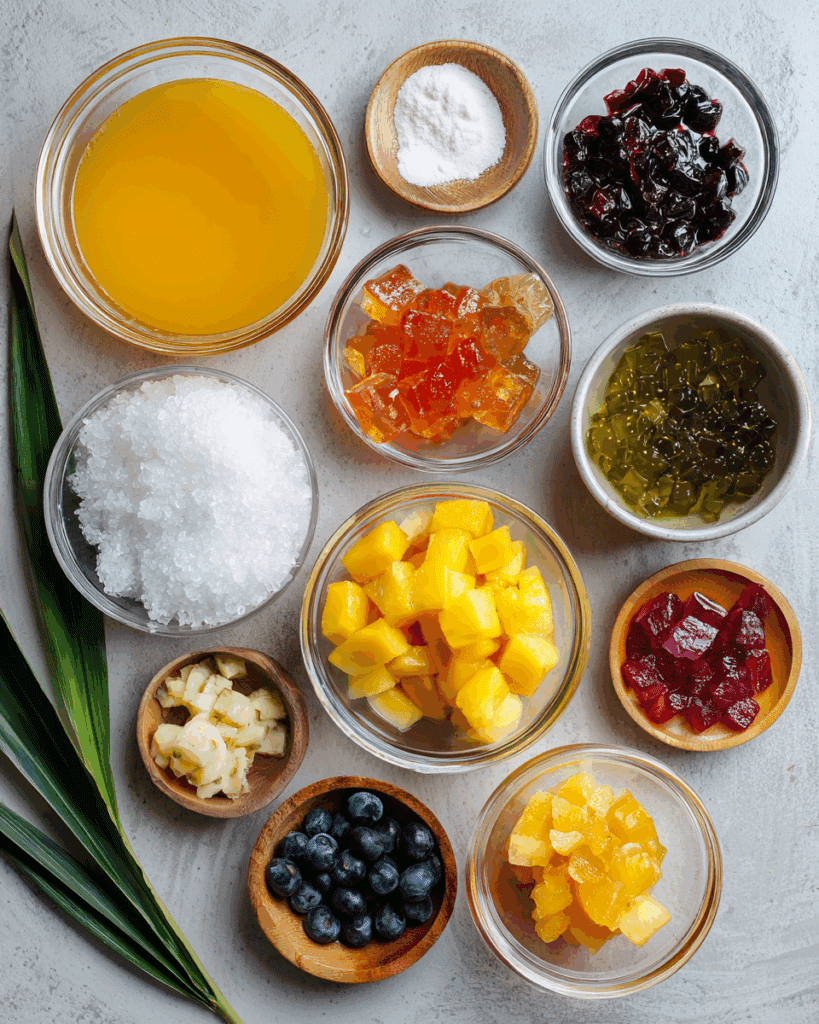
- ~2 cups mixed fresh fruit (mango, kiwi, lychee, papaya, pineapple, blueberries)
- ¾ cup full-fat coconut milk
- ¼ cup water (for coconut layer)
- ¾ teaspoon + ⅛ teaspoon agar agar powder (for coconut layer)
- 3 tablespoons sugar (for coconut layer)
- A pinch of salt
- ~4 inches pandan leaf (optional)
- ¾ cup juice of your choice (e.g. mango)
- ¼ cup water (for juice layer)
- ¾ teaspoon + ⅛ teaspoon agar agar powder (for juice layer)
- Sugar to taste (for juice layer)
Instructions
- Prepare all fruits by washing, peeling, and cutting into small pieces. Measure all ingredients for each layer separately and set aside.
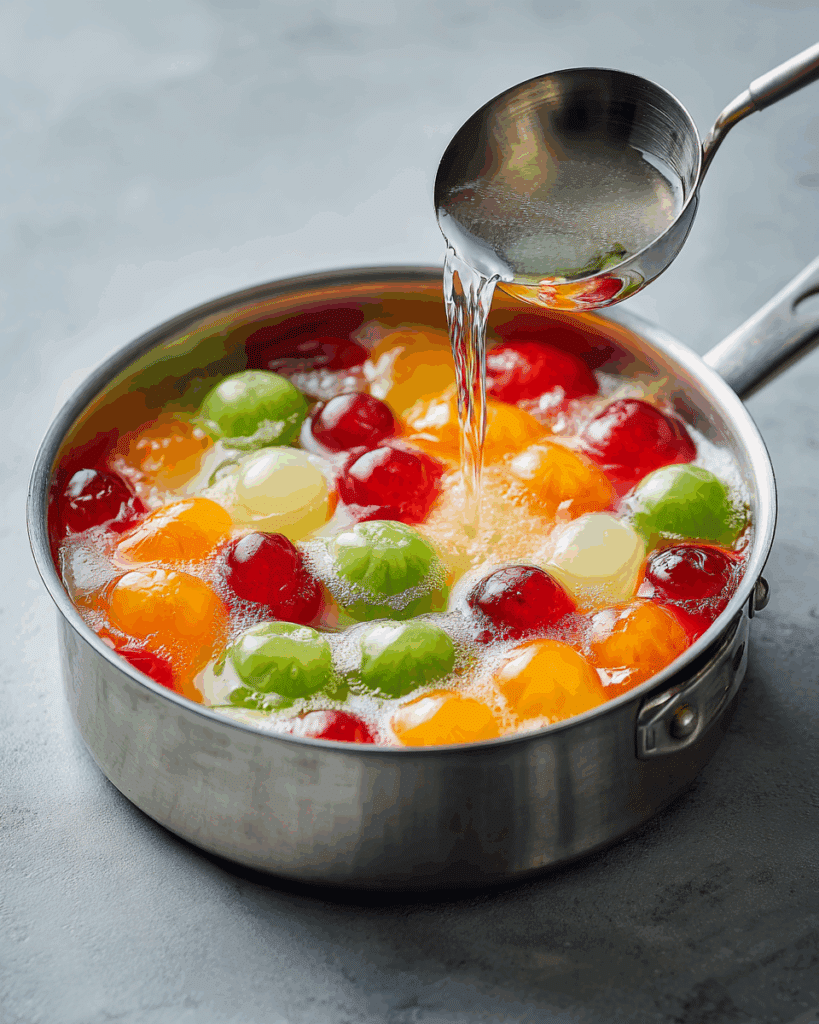
- In a saucepan, mix cold water, lychee juice, and agar agar powder. Stir until no lumps remain. Turn on heat and bring to a boil, stirring constantly. Boil for 1 minute until agar is fully dissolved. Add sugar and stir until dissolved.
- Pour a thin layer of the agar mixture into the mold. Quickly arrange fruits evenly in the layer. Gently pour remaining mixture over the fruit. Let sit until firm.
- For the coconut layer, mix coconut milk, water, and agar agar powder in a saucepan. Add pandan leaf if using. Stir well and bring to a boil while stirring. Boil for 1 minute, then add sugar and salt. Remove pandan leaf.
- Ensure fruit layer is firm to touch. Pour the hot coconut mixture gently over the set fruit layer. Let sit until firm.
- Prepare the juice layer by mixing juice, water, and agar agar powder. Bring to a boil while stirring. Boil for 1 minute. Add sugar if needed and stir until dissolved.
- Check the coconut layer for firmness. Slowly pour juice layer on top, using the back of a spoon to soften the flow if needed. Let sit at room temperature for 30 minutes, then refrigerate for at least 2 hours.
- To unmold, loosen edges with a spatula. Dip mold in warm water for a few seconds and invert onto a plate. Slice and serve chilled.
Notes
- Use full-fat coconut milk for creaminess.
- Do not freeze the cake—agar jelly becomes rubbery when thawed.
- Boil agar mixtures fully to activate setting properties.
- Layer pouring should be gentle to avoid breaking the layer underneath.
- Let each layer cool just enough before pouring the next to prevent separation.
Nutrition
- Serving Size: 1 slice (1/10 of cake)
- Calories: 110
- Sugar: 12g
- Sodium: 25mg
- Fat: 4g
- Saturated Fat: 3g
- Unsaturated Fat: 1g
- Trans Fat: 0g
- Carbohydrates: 17g
- Fiber: 2g
- Protein: 1g
- Cholesterol: 0mg
Keywords: Agar jelly fruit cake, Thai dessert, vegan fruit cake, jelly cake, layered agar cake, tropical jelly dessert
Choosing the Right Ingredients for the Perfect Agar Jelly Fruit Cake
Fruit Layer – Your Foundation of Flavor and Color
The fruit layer is the most visually striking part of this dessert. It’s where the colors pop and where fresh, juicy fruits shine. This layer is made using a base of water, lychee juice, sugar, and agar agar powder.
You’ll need:
- 1⅓ cups water
- ⅔ cup juice from canned lychee (save the lychee fruit too)
- ¼ cup sugar
- 1¾ teaspoons agar agar powder
- About 2 cups of chopped fruit (mango, pineapple, red papaya, kiwi, lychee, blueberries)
Choose fruits that hold their shape and have contrasting colors. Mango brings a deep yellow, papaya gives a coral hue, kiwi adds a vibrant green, while blueberries create that deep blue contrast. Avoid fruits like watermelon that release too much water and can affect the jelly’s firmness.
Using lychee juice enhances the tropical flavor and gives a slight floral fragrance. For sourcing canned tropical fruits, you can check out this guide to the best canned fruit options.
Coconut Layer – Smooth, Creamy, and Mildly Sweet
The coconut layer adds richness and softens the overall flavor profile. It’s made with full-fat coconut milk, water, agar agar powder, sugar, and a pinch of salt. For a deeper flavor, you can add a pandan leaf.
Ingredients:
- ¾ cup full-fat coconut milk
- ¼ cup water
- ¾ teaspoon + ⅛ teaspoon agar agar powder
- 3 tablespoons sugar
- A pinch of salt
- Optional: 4 inches of pandan leaf (fresh or frozen)
Pandan is widely used in Thai desserts for its delicate, sweet aroma. If you’ve never worked with it, this article on pandan leaves explains its unique flavor profile and how to use it properly.
Make sure to stir constantly when boiling to avoid separating the coconut milk. Once this layer is poured on the fruit, it creates a beautiful contrast between clear jelly and milky white cream.
Bottom Juice Layer – Fruity Finish That Completes the Cake
The final layer adds another dimension of fruitiness and color. It ties the whole dessert together and gives a flavor contrast to the coconut layer above it.
You’ll need:
- ¾ cup fruit juice (mango juice is recommended)
- ¼ cup water
- ¾ teaspoon + ⅛ teaspoon agar agar powder
- Sugar to adjust sweetness if necessary
Mango juice works beautifully here thanks to its bold flavor and color. If your juice is watery or pale, opt for passion fruit, pink guava, or a thicker tropical nectar. Just be sure it complements the fruit used in the top layer.
This layer should be poured only after the coconut layer has set to the touch. To avoid piercing the soft coconut surface, pour the juice over the back of a spoon to distribute it gently.
Understanding Agar Agar Powder
The star of this dessert is agar agar powder. It’s a plant-based gelling agent derived from seaweed and is commonly used in Thai and other Asian cuisines. It’s not the same as gelatin and behaves very differently.
Here’s why agar agar is perfect for this cake:
- It sets at room temperature
- It creates a firmer, cleaner texture
- It’s completely vegan and natural
- It holds up well in warmer climates
When using agar agar powder, always mix it with cold liquid first before heating. This prevents clumping and ensures it activates properly. Bring the mixture to a full boil while stirring constantly. Agar agar sets quickly, so work efficiently once it’s removed from heat.
Accurate measurements are crucial. Even a small variation in agar powder can change the texture completely. Use measuring spoons and follow instructions closely for the best results.
Tools and Preparation You’ll Need
Before jumping into the cooking process, having the right tools and preparing everything in advance will make your experience smoother and more enjoyable. Since agar sets quickly once off the heat, this dessert requires efficient multitasking. Prepping ahead ensures you don’t lose valuable time when working on layers.
Essential Tools for Making Agar Jelly Fruit Cake
Making a beautiful and successful Agar Jelly Fruit Cake doesn’t require fancy equipment, but the tools you do use matter. Here’s what you’ll need:
- Small Saucepan (x3): Since each layer must be made and cooked separately, you’ll either need to clean your pot quickly between layers or have two to three small saucepans ready.
- Measuring Cups and Spoons: Precision matters when working with agar. Even small deviations can affect the setting quality.
- Heatproof Spatula or Whisk: To keep agar from clumping during heating.
- Silicone or Nonstick Mold: This is where the magic happens. Use a heatproof mold with enough depth (at least 2 inches) for all layers. Silicone molds make unmolding easier.
- Strainer: Especially useful for removing pandan leaves or catching any clumps of undissolved powder.
- Spoon or Ladle: For gently layering liquids without disturbing the one below.
Looking for inspiration? Try this vibrant Sticky Rice Layer Cake recipe, which also involves layering and is another must-try Thai dessert.
Ingredient Prep Tips Before You Begin
One of the key secrets to success with this recipe is mise en place, or preparing all ingredients and tools before starting. Since agar agar begins to set quickly after boiling, you won’t have time to stop and chop fruit once your mix is hot.
What to do before you begin:
- Chop all fruits into small, even pieces. Keep them in the fridge until you need them to stay fresh.
- Separate the juice from the canned lychee and set both aside.
- Measure out all agar agar powder, sugar, liquids, and other ingredients for each layer into small bowls.
- Soften the pandan leaf if using frozen, by rinsing it with warm water.
- Lay out your mold on a heatproof surface so you can pour each layer immediately once it’s ready.
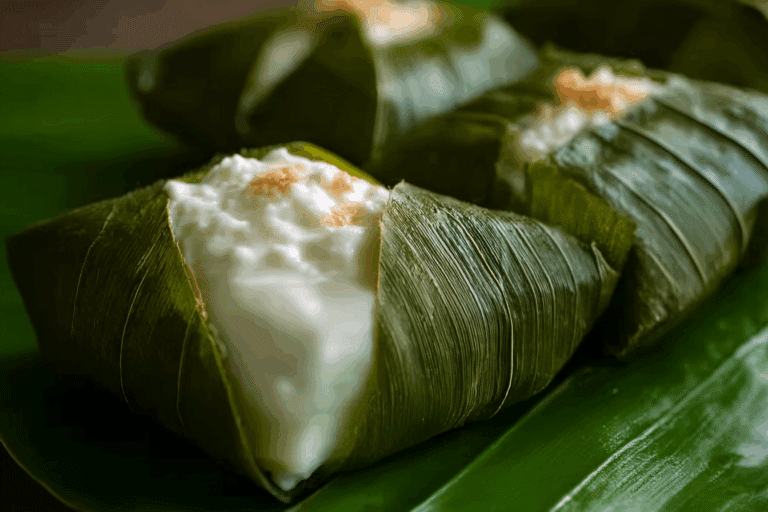
Discover great ideas like Steamed Pandan Tapioca Cakes, which also use agar and require similar prep steps for success.
Choosing the Right Mold
The final appearance of your agar jelly fruit cake depends a lot on the mold you use. Here are a few mold types and what they offer:
- Silicone Molds: Easiest to work with because they flex and release the jelly easily. Great for detailed patterns.
- Glass or Ceramic Pans: More traditional, but can be tricky when unmolding. To help, run a butter knife along the edge and dip the mold briefly in warm water before inverting.
- Bundt or Ring Molds: Provide a classic jelly cake shape with a hole in the middle—perfect for special occasions.
Avoid using metal molds unless they are nonstick and specifically labeled heat-safe. Thin metal molds can cool unevenly and result in weak layers.
Don’t miss our simple and fun Thai Rolled Ice Cream tutorial, where presentation plays a big role just like in jelly fruit cakes.
Timing and Temperature Matter
Each layer must cool slightly before the next one is poured, but not too much—or they won’t adhere well and may separate when sliced. The best technique is to touch the surface gently with your fingertip. If it’s firm and dry, it’s ready for the next layer.
Keep each new agar mixture hot (but not boiling) when ready to pour. If it begins to set in the pot, reheat gently and stir until liquid again.
Quick Tip: When pouring the next layer, use the back of a spoon to break the fall of hot liquid and protect the set layer underneath. This prevents indentations or break-throughs.
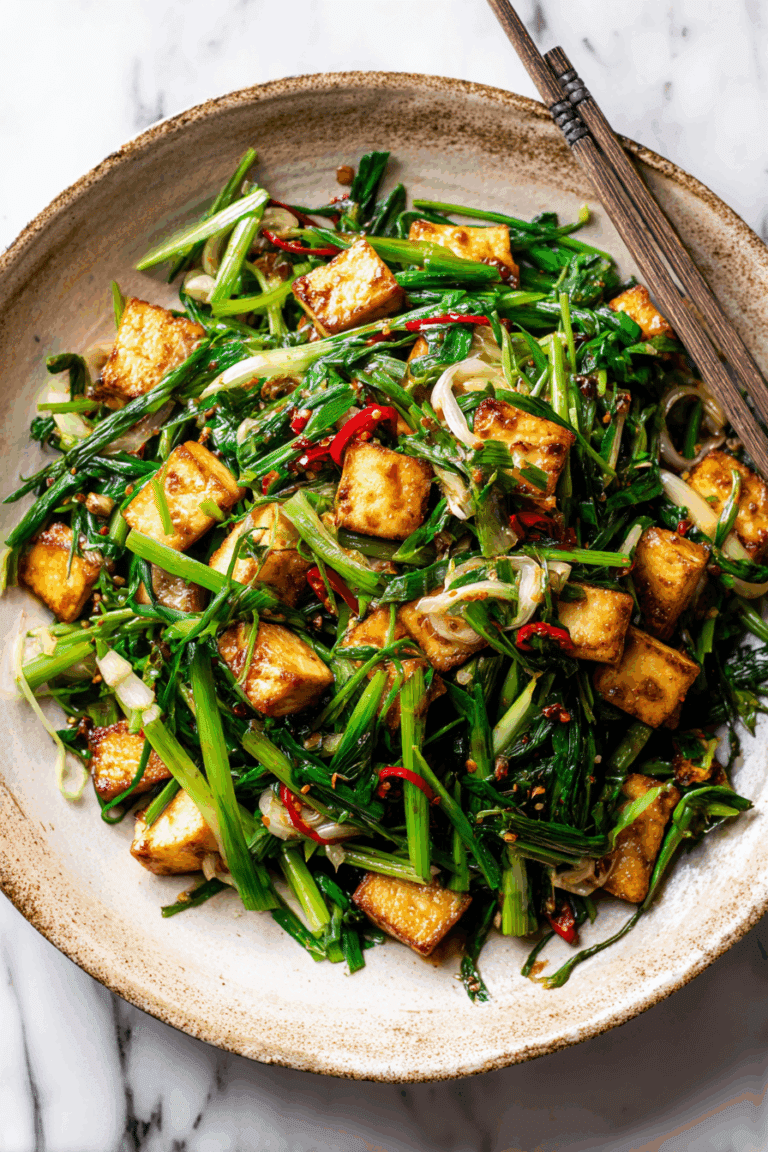
Looking for something savory? Check out the vibrant Thai Pineapple Fried Rice to pair with your dessert and create a complete Thai-themed meal.
How to Make the Fruit Layer
The fruit layer is the most eye-catching part of the Agar Jelly Fruit Cake. It sets the tone for the entire dessert and is often what gets people to say “Wow” before they even take a bite. This layer not only holds the colorful fruit in suspension but also adds a light sweetness and subtle floral flavor, especially when made with lychee juice. It’s essential to get this first layer right, as it supports the structure and presentation of the entire cake.
Preparing the Fruit Layer Base
Start by gathering and measuring all your ingredients:
- 1⅓ cups cold water
- ⅔ cup juice from canned lychee (reserve the lychee fruit)
- ¼ cup sugar
- 1¾ teaspoons agar agar powder
- ~2 cups fresh, chopped fruit (mango, kiwi, pineapple, papaya, lychee, blueberries)
The key to success here is to mix the agar agar powder with cold liquids first. This prevents clumping and ensures a smooth gel texture once cooked. Combine the water, lychee juice, and agar agar powder in a small pot. Whisk thoroughly until no lumps remain, then turn on the heat.
Bring the mixture to a full boil while stirring constantly. Once it reaches a boil, let it cook for at least 1 minute to activate the agar completely. You can test if it’s ready by spooning out a little liquid and watching it set on a cold plate. If it gels up without gritty particles, it’s ready.
Add the sugar after boiling and stir until dissolved. Now it’s time to move quickly.
Layering the Fruit in the Mold
Pour about ¼ inch of the hot liquid into your mold to form the base. Immediately begin placing your prepared fruit into the layer. Use a mix of colors and shapes to create visual contrast. Lay larger pieces first, followed by smaller fruits like blueberries that can fill the gaps.
Once the fruit is arranged, gently pour in the remaining liquid. Tilt the mold slightly to ensure the liquid spreads evenly and surrounds the fruit completely.
Avoid pouring too fast or from too high above, as this can displace your neatly arranged fruit.
Let this layer rest at room temperature for 10–15 minutes, or until the surface is firm to the touch. It doesn’t need to be fully set, just solid enough to support the next layer.
For step-by-step visuals and additional techniques, you can also follow along with this detailed agar agar fruit cake tutorial by Hot Thai Kitchen. Their clear demonstrations are especially helpful for first-time makers.
Fruit Choices and Tips
Your fruit choice should balance between firm and soft textures. Mango and papaya give vibrant color and a smooth bite, while kiwi adds tartness and a unique pattern. Avoid watery fruits like watermelon or soft ones like bananas that may discolor or release too much moisture.
Canned fruits can be used for convenience, but make sure to drain them well. Lychees from the can are perfect as they add fragrance and softness.
Make sure fruits are fully submerged to avoid air bubbles. If bubbles form, pop them with a toothpick before the layer sets.
Looking for a twist? The version on Yummy Tales of Tummy uses layered fruit for an ombre effect, adding an extra level of visual appeal. You can adapt this technique for your cake too.
Texture Troubleshooting
- If the fruit floats to the top, your mixture may have cooled too much before pouring. Always work while the agar is still hot.
- If the jelly layer is cloudy, ensure you boiled the agar properly and used clear juices.
- If fruit sinks, cut them smaller or let the first pour partially set before adding fruit.
For a different method and flavor inspiration, take a look at this fruit jelly cake recipe using agar agar from Ribbons to Pastas. They offer ideas for creative molds and layering variations.
Now that your fruit layer is set and looking stunning, it’s time to move on to the smooth, creamy middle layer.
Perfecting the Coconut Layer for Your Agar Jelly Fruit Cake
The coconut layer is where the Agar Jelly Fruit Cake gains its depth and contrast. Nestled between the vibrant fruit and the juicy base, this middle layer adds a creamy, silky mouthfeel that balances the overall flavor. While the fruit and juice layers are light and bright, the coconut layer grounds the dessert with richness. It’s a beautiful complement that makes this cake stand out from typical jelly treats.
Why the Coconut Layer Matters
In a multi-layered Agar Jelly Fruit Cake, each section must offer a unique experience. The coconut layer does just that. It adds a subtle sweetness, a velvety texture, and a comforting flavor that’s iconic in many Thai desserts. It also acts as a visual and structural transition between the colorful top and the bold juice base.
Using full-fat coconut milk is essential. It provides the creaminess you want without being too heavy or watery. Light coconut milk often results in a diluted flavor and unstable jelly texture, so avoid it if you can.
Ingredients for the Coconut Layer
To make the perfect coconut layer, gather the following:
- ¾ cup full-fat coconut milk
- ¼ cup water
- ¾ teaspoon + ⅛ teaspoon agar agar powder
- 3 tablespoons sugar
- A pinch of salt
- Optional: 4 inches of pandan leaf (for aroma)
If you’re adding pandan leaf, slightly bruise it by folding or tearing before cooking. This releases more of its natural oils and fragrance into the mix. The salt is just as important as the sugar—it enhances the coconut flavor and brings out its creaminess.
Cooking the Coconut Layer
- Combine coconut milk, water, and agar agar powder in a small saucepan.
- If you’re using pandan, add it now.
- Stir the mixture thoroughly before turning on the heat to dissolve the agar agar completely.
- Bring it to a gentle boil over medium-high heat while stirring continuously.
- Let it boil for one full minute to activate the agar.
- Remove from heat, stir in the sugar and salt, and make sure everything is dissolved.
If you’ve used pandan, remove the leaf before pouring. At this point, your fruit layer should be firm enough to support the next layer.
Layering Tips
Gently pour the hot coconut mixture over the fruit layer. To prevent heat from disturbing the top of the fruit layer, pour the liquid slowly over the back of a spoon just above the surface. This diffuses the flow and protects the set jelly underneath.
If you notice the coconut layer forming bubbles on top, let it sit for 30 seconds, then lightly skim the surface with a spoon before pouring.
Let the coconut layer sit undisturbed at room temperature for at least 15–20 minutes. It should feel firm and dry to the touch before adding the final layer.
Common Issues and How to Avoid Them
Layer Separation: If the fruit layer isn’t firm enough, the coconut jelly may seep through and create uneven results. Always check that the layer underneath is firm to the touch before proceeding.
Grainy Texture: This happens when agar agar is not fully dissolved. Make sure to boil long enough and stir constantly during cooking.
Cracking: If layers cool too quickly or at different temperatures, cracks may appear when slicing. Let each layer cool evenly at room temperature before refrigerating.
The coconut layer is a key element that transforms your Agar Jelly Fruit Cake into something extraordinary. With its creamy texture and subtle sweetness, it acts as a delicious bridge between the fresh fruit and the bold juice base. When done right, it adds both flavor and elegance, making each bite more memorable.
Creating the Bottom Juice Layer for Your Agar Jelly Fruit Cake
The final piece of your Agar Jelly Fruit Cake masterpiece is the bottom juice layer—a vibrant foundation that complements both the visual and flavor profile of the dessert. While it may seem like the simplest part of the recipe, this layer is critical. It holds the entire cake together and provides that refreshing fruity finish that contrasts beautifully with the creamy coconut center and the sweet-tart fruit top.
This layer not only seals the structure but also adds a burst of flavor as the last thing your spoon touches. When sliced, the bright color at the base highlights the tropical appeal of the Agar Jelly Fruit Cake, making it irresistible at first glance and first bite.
Ingredients You’ll Need
To create the perfect bottom juice layer, prepare the following ingredients:
- ¾ cup of fruit juice (mango juice works exceptionally well)
- ¼ cup water
- ¾ teaspoon + ⅛ teaspoon agar agar powder
- Sugar to taste, depending on your juice’s sweetness
If your juice is already sweetened, you may not need any additional sugar. However, always taste before cooking to ensure the balance is just right. A well-balanced bottom layer enhances the overall flavor harmony of the cake without overpowering the subtle notes in the fruit and coconut layers.
Thicker juices like mango, guava, or passion fruit add bold color and a strong flavor that holds its own against the richness of coconut and the freshness of the fruit. Make sure the juice you choose complements the fruits used in the top layer of the Agar Jelly Fruit Cake.
Cooking the Juice Layer
- In a saucepan, mix the juice, water, and agar agar powder while still cold. Stir thoroughly to dissolve the powder completely.
- Turn the heat to medium and bring the mixture to a gentle boil. Stir constantly to prevent the agar from sticking to the bottom or forming clumps.
- Let it boil for about 1 minute. This activates the agar agar and ensures the mixture will set properly once poured.
- Once done, remove from heat and taste. Add sugar if needed, and stir until fully dissolved.
Pouring the Final Layer
Before pouring the juice mixture, check the coconut layer. It should be firm to the touch—not soft or sticky. Gently tap it with your fingertip to confirm. If you pour too early, the layers may mix or bleed, ruining the clean visual lines that make the Agar Jelly Fruit Cake so appealing.
To keep the top of the coconut layer intact:
- Use the back of a spoon to slowly pour the juice layer over the surface.
- Start from the edges and work your way toward the center to minimize direct impact.
- Allow the cake to cool at room temperature for about 30 minutes before transferring to the refrigerator.
This gradual cooling process helps prevent cracking and ensures a smooth, flawless surface.
Final Chilling Time
Once all layers are assembled and set at room temperature, place the Agar Jelly Fruit Cake in the refrigerator for at least 2 hours. This step ensures the entire dessert is fully chilled and firm, which is crucial for clean slicing and optimal texture.
While agar sets at room temperature, refrigeration enhances the firmness and provides a refreshing cold bite that’s perfect for a hot day. When fully chilled, the cake should release easily from the mold with just a gentle tug or a quick dip in warm water.
Texture and Flavor Notes
The juice layer should be:
- Slightly firmer than the coconut layer
- Light, fruity, and smooth on the tongue
- Clearly defined with no bubbles or unevenness
When sliced, the contrast between the clear fruit layer, the creamy white coconut layer, and the vibrant juice base creates a stunning presentation that perfectly reflects the tropical spirit of the Agar Jelly Fruit Cake.
This bottom layer not only completes the look but also rounds out the entire flavor experience. The sweet, tangy finish of the juice enhances the fruit’s brightness and offers a refreshing conclusion to each bite.
Cooling, Unmolding, and Presentation Tips for the Perfect Agar Jelly Fruit Cake
After carefully layering each component, the final step in crafting your Agar Jelly Fruit Cake is just as important as the cooking process: letting it cool properly, unmolding it without damage, and presenting it in a way that showcases its beauty. These steps determine how your final result looks, slices, and holds together on the plate.
Unlike typical cakes that rely on flour and structure from baking, your Agar Jelly Fruit Cake depends on precision cooling and careful handling to maintain its integrity. Follow these techniques to bring out the best in your creation.
Cooling the Cake Properly
Once you’ve poured your juice layer over the set coconut layer, allow the entire mold to sit undisturbed at room temperature for at least 30 minutes. This allows the top layer to begin setting naturally, which prevents surface cracking or texture inconsistencies.
Afterward, transfer your mold to the refrigerator. For best results, chill the Agar Jelly Fruit Cake for at least 2 hours, but preferably overnight. This ensures that every layer is set firmly and chilled evenly. The firmness of agar means you don’t need to worry about the jelly melting at room temperature, but chilling adds to the refreshing nature of the dessert.
Avoid putting the cake directly into the freezer. Agar jelly becomes rubbery and can separate when frozen and thawed.
Unmolding Like a Pro
Unmolding a layered jelly cake might seem intimidating, but with agar-based desserts, it’s easier than most expect. Here’s how to do it without damaging your beautiful layers:
- Loosen the edges: Gently run a butter knife or thin spatula along the edges of the mold. Be careful not to cut into the jelly layers.
- Use warm water: Fill a large bowl or sink with warm (not hot) water. Dip the mold into the water for 10 to 15 seconds, making sure water doesn’t touch the jelly itself.
- Invert and release: Place a plate or serving tray on top of the mold, then quickly flip both over. Gently tap the bottom or shake slightly to release. The cake should slide out cleanly.
Silicone molds make this process much easier, especially for beginners. If you used a rigid mold like glass or metal, the warm water step is even more important to loosen the jelly from the sides.
Presentation Tips
The visual appeal of the Agar Jelly Fruit Cake is one of its strongest qualities. Once unmolded, its layered structure and suspended fruit create a stunning effect. Here are some ways to elevate the presentation:
- Use a white serving platter to highlight the colors of the fruit.
- Garnish the plate with a few fresh fruits that match those inside the cake—kiwi slices, lychee, or mango fans work beautifully.
- Drizzle with coconut cream or serve with a side of lightly sweetened coconut milk for added richness.
- Add edible flowers or mint leaves for a pop of color and freshness.
If you’re preparing this dessert for a gathering, slice it ahead of time and place each piece in a decorative ramekin or small dessert dish. This makes serving easier and keeps the jelly clean and intact.
Slicing and Storing
Use a thin, sharp knife to slice the Agar Jelly Fruit Cake. Dipping the knife in hot water before each cut helps achieve clean edges and prevents sticking.
Store any leftovers in an airtight container in the refrigerator for up to 3 days. While agar holds up better than gelatin, extended refrigeration can sometimes cause slight weeping (liquid release), so it’s best enjoyed within the first couple of days.
Avoid stacking slices, as this can cause them to stick or collapse. Keep them in a single layer if storing in containers.
Troubleshooting Common Issues
Even the most carefully prepared Agar Jelly Fruit Cake can run into issues. Here’s how to handle a few common problems:
- Layers separate after chilling: This happens when the bottom layer was too cold or set too long before the next one was added. Always pour the next layer while the one beneath is just set—not fully hardened.
- Cracks on the surface: Caused by rapid chilling or uneven agar activation. Let each layer cool gradually before moving to the fridge.
- Cloudy jelly: Ensure agar is fully dissolved during boiling and always strain if needed.
- Fruit floats or sinks: This depends on timing. Add fruit as soon as the first thin layer is poured and still hot enough to suspend, but not so hot that it cooks the fruit.
Perfecting the cooling and presentation process transforms your Agar Jelly Fruit Cake from a simple treat into a true showstopper. With its glossy finish, vibrant layers, and refreshing flavor, it’s guaranteed to impress at any table.
Common Mistakes and How to Fix Them When Making Agar Jelly Fruit Cake
Even though Agar Jelly Fruit Cake is a relatively straightforward recipe, there are a few common mistakes that can turn a stunning dessert into a disappointing one. Working with agar requires precision, especially when dealing with multiple layers. If this is your first time making an agar-based cake, don’t worry. Most issues can be easily corrected or avoided altogether with the right approach.
Below are the most frequent problems home cooks face when making Agar Jelly Fruit Cake—along with clear solutions to help you get it right every time.
1. The Layers Are Separating
This is one of the most common issues. After slicing your beautiful cake, you notice the layers peel away from one another or don’t hold together.
Why it happens:
- The bottom layer set too firmly before the next layer was poured.
- The temperature difference between layers was too extreme.
How to fix or prevent it:
- Always pour the next layer when the one underneath is set just enough—firm to the touch but not completely hardened.
- Make sure your next layer is still hot when pouring, but not boiling, and pour it gently using a spoon to avoid disturbing the layer beneath.
Timing is everything in Agar Jelly Fruit Cake. Don’t rush, but don’t wait too long either. Watching the texture as it sets is key.
2. Cloudy or Gritty Texture
Instead of that clear, glass-like finish, your fruit layer turns out cloudy or has specks floating in it.
Why it happens:
- Agar agar powder wasn’t fully dissolved.
- You skipped the straining step or didn’t boil the mixture long enough.
How to fix or prevent it:
- Always dissolve agar agar in cold liquid first, then bring it to a boil. Stir constantly and allow it to boil for at least 60 seconds to fully activate.
- If you’re unsure, strain the mixture before pouring it into the mold.
A clear fruit layer is the signature of a well-made Agar Jelly Fruit Cake, so take the time to boil and strain if needed.
3. Fruit Floats or Sinks
Instead of being suspended beautifully throughout the jelly, your fruit either rises to the top or sinks to the bottom.
Why it happens:
- The agar liquid was too hot when you added the fruit.
- You waited too long, and the jelly started to set before adding the fruit.
How to fix or prevent it:
- Pour a small amount of the jelly first, let it slightly cool and thicken, then add fruit pieces.
- Once the fruit is placed, pour the rest of the jelly carefully while still warm and fluid.
This method keeps the fruit suspended and evenly distributed throughout the Agar Jelly Fruit Cake, giving it that stunning mosaic effect.
4. Cracked or Broken Layers
When unmolding or slicing, you find cracks running through the layers, or slices fall apart.
Why it happens:
- Rapid chilling in the fridge or freezer caused the agar to contract too quickly.
- Uneven layering and temperature shock between layers.
How to fix or prevent it:
- Let each layer cool gradually at room temperature before refrigerating.
- Don’t pour layers that are too hot over layers that are already cold and firm.
A good Agar Jelly Fruit Cake has a smooth, continuous structure with seamless transitions between layers. Proper temperature control helps maintain this.
5. Jelly Is Too Firm or Too Soft
Your jelly either feels too rubbery or won’t hold its shape when sliced.
Why it happens:
- Incorrect measurements of agar agar powder.
- Different brands of agar may vary in strength.
How to fix or prevent it:
- Stick to precise measurements. Use measuring spoons or a digital scale for accuracy.
- If using a new brand, test a small batch first to gauge firmness and adjust if needed.
The ideal Agar Jelly Fruit Cake has a firm, sliceable texture that isn’t chewy. When you press a slice with a spoon, it should resist slightly and bounce back without crumbling.
6. Cake Sticks to the Mold
You’ve waited hours for your cake to chill, but it won’t come out of the mold—or worse, it breaks while unmolding.
Why it happens:
- The mold wasn’t loosened properly before inverting.
- The cake wasn’t fully set.
How to fix or prevent it:
- Use a silicone mold if possible for easier release.
- Gently loosen the edges with a knife or dip the mold in warm water for a few seconds before unmolding.
Patience is key. Let the Agar Jelly Fruit Cake chill fully for at least 2 hours to ensure structural integrity before trying to remove it from the mold.
Final Pro Tips
- Keep agar agar powder dry and tightly sealed. Moisture can reduce its effectiveness.
- Don’t substitute gelatin—it will not behave the same way or hold layers as well.
- Practice on smaller batches if you’re new to layering with agar.
Each of these common mistakes is easily avoidable with preparation and attention to detail. With these fixes in mind, your Agar Jelly Fruit Cake will not only taste amazing but look like a professional creation every single time.
Variations You’ll Love for Your Agar Jelly Fruit Cake
One of the most delightful things about making Agar Jelly Fruit Cake is how versatile it is. Once you’ve mastered the basic method, you can start playing with ingredients, flavors, and presentation to create your own personalized version of this vibrant dessert. Whether you’re inspired by Thai ingredients, seasonal fruits, or simply want to experiment with colors, the possibilities are endless.
Here are some of the most delicious and creative variations you can try to elevate your Agar Jelly Fruit Cake to new heights.
Tropical Paradise Version
Lean deeper into tropical flavors by incorporating fruit like passion fruit, dragon fruit, and starfruit. Use coconut water instead of plain water in the fruit layer to add a subtle sweetness. For the juice layer, blend mango and pineapple juice for a bold, yellow-orange color and a more intense tropical taste.
You can also add a dash of lime juice to the fruit layer mixture for a zesty twist. It enhances the freshness and adds brightness to the overall flavor profile of your Agar Jelly Fruit Cake.
Thai Tea Agar Jelly Fruit Cake
Add a strong Thai tea flavor to the coconut layer or replace the juice layer with Thai iced tea. Use sweetened condensed coconut milk to stay dairy-free while keeping the flavor authentic.
Thai tea creates a warm orange hue and a bold, spiced flavor that pairs well with mango, lychee, or papaya. This version is especially impressive during festive occasions and gives your Agar Jelly Fruit Cake a unique Thai identity.
Matcha Coconut Layer
For a modern, elegant variation, add matcha powder to your coconut layer. The earthy flavor of green tea adds complexity and color contrast between the fruit and juice layers.
You can whisk 1 teaspoon of matcha powder into the coconut milk mixture before boiling with agar. This green layer paired with fresh kiwi, lychee, and blueberries makes your Agar Jelly Fruit Cake visually stunning and full of health benefits.
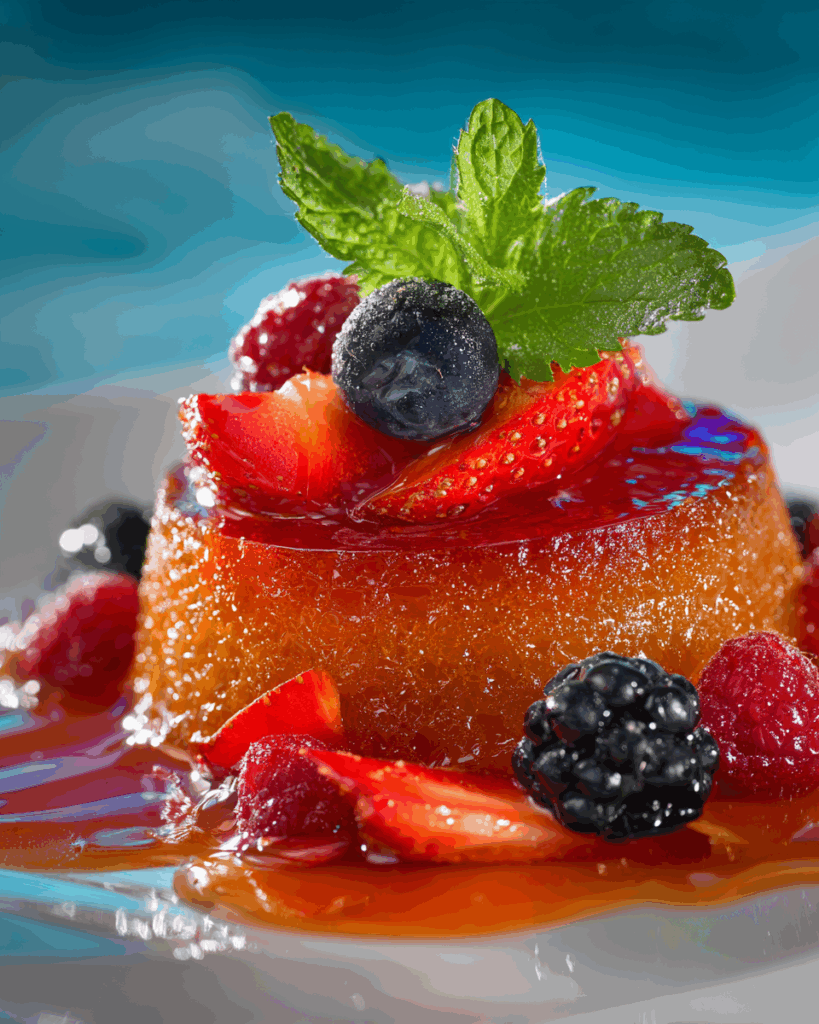
Mixed Berry Garden
Transform your jelly fruit cake into a berry lover’s dream. Use a blend of strawberries, raspberries, blueberries, and blackberries in the fruit layer. These berries create a bold, deep color mix and a sweet-tart balance that makes the cake refreshing and satisfying.
For the juice layer, go with pure berry juice or a mix of blueberry and grape juice to enhance the berry flavor from top to bottom. It’s a perfect variation for spring picnics or summer brunches.
Coconut Coffee Fusion
Want something with a little grown-up flair? Swap the juice layer for a strong coffee or espresso-based mixture. Keep the coconut layer traditional or enhance it with vanilla extract. The contrast between coffee, coconut, and fruit makes this Agar Jelly Fruit Cake more sophisticated while still being light and dairy-free.
This version pairs well with sliced bananas and roasted coconut flakes added to the fruit layer. It’s an unexpected twist that dessert lovers will appreciate.
Rainbow Layered Agar Jelly Fruit Cake
For the ultimate showstopper, make a multi-layered rainbow version using fruit purées or colored juices. Each layer can be a different color and flavor—mango for yellow, strawberry for red, blueberry for purple, and so on.
Be sure to chill each layer until just set before pouring the next, and keep your agar mixtures warm between layers to avoid them setting in the pot. The final result is a magical, colorful Agar Jelly Fruit Cake that’s perfect for birthdays or festive celebrations.
Vegan Yogurt Agar Jelly Fruit Cake
For a creamy twist without dairy, incorporate plant-based yogurt into the coconut layer. Choose a coconut, almond, or oat-based yogurt and mix it with coconut milk. The result is a smooth, pudding-like texture with the firmness of agar.
Add fruits like peaches, kiwi, and strawberries for a classic parfait flavor. This version is great for people who prefer creamy textures in their desserts but still want the refreshing feel of jelly.
Layer Swap: Coconut on Top
For a fresh presentation, reverse the order of the layers and pour the coconut layer first, followed by the fruit layer, and then the juice layer last. This creates a new visual with the creamy coconut on top and the colorful fruit floating beneath it.
Let each layer set completely before pouring the next, and flip the cake after unmolding to reveal the coconut top. It’s a great way to surprise guests and show off your creativity with Agar Jelly Fruit Cake.
Seasonal Fruit Editions
Celebrate the seasons by using fruits that are at their peak:
- Spring: Strawberries, cherries, and mangoes
- Summer: Pineapple, watermelon (use small firm cubes), blueberries
- Fall: Figs, grapes, and apples (blanched briefly)
- Winter: Citrus segments, pomegranate seeds, canned tropical fruits
Each season brings its own flavors and colors, allowing your Agar Jelly Fruit Cake to evolve all year long. Matching the juice layer to your fruit choices enhances the overall taste.
Conclusion
Making an Agar Jelly Fruit Cake at home is more than just preparing a dessert—it’s creating an edible piece of art that celebrates color, texture, and flavor all in one refreshing slice. Whether you’re serving it at a party, bringing it to a picnic, or simply making it as a creative kitchen project, this tropical-inspired jelly cake never fails to impress.
What makes the Agar Jelly Fruit Cake so special is its balance. It’s firm yet delicate, sweet but light, colorful yet clean, and most importantly—easy to customize. From choosing your fruits to experimenting with different juices or creamy layers, there’s no limit to how you can adapt this cake to suit your tastes, dietary needs, or the season.
Throughout this guide, we explored every layer in detail:
- The fruit layer, filled with vibrant pieces and suspended in a lightly sweet, clear jelly
- The coconut layer, smooth and creamy for that comforting contrast
- The juice layer, bold and refreshing as the perfect final touch
We also walked through the importance of the right tools, prepping in advance, avoiding common mistakes, and trying exciting variations that can make every Agar Jelly Fruit Cake you create feel like a brand-new dessert.
Once you’ve tried it once, you’ll see why this cake is so beloved across Southeast Asia and increasingly around the world. It’s a visually stunning, healthy, and naturally vegan dessert that feels indulgent while remaining light and refreshing. Plus, it holds up well without refrigeration, making it ideal for summer events and outdoor dining.
If you’re looking for a creative, customizable, and stunning dessert that leaves a lasting impression, the Agar Jelly Fruit Cake is your go-to recipe. The process may seem detailed, but once you understand how each layer works, you’ll enjoy every moment of making—and eating—it.
Ready to share your creation? Snap a photo, add your own twist, and spread the joy. There’s nothing more satisfying than slicing into your own homemade Agar Jelly Fruit Cake and seeing those perfect, colorful layers come to life.
Frequently Asked Questions About Agar Jelly Fruit Cake
Can I make Agar Jelly Fruit Cake without coconut milk?
Yes, you can absolutely make a Agar Jelly Fruit Cake without coconut milk. While the coconut layer adds richness and flavor, it’s optional and can be replaced with other creamy alternatives. You can use plant-based milk such as almond, oat, or soy milk to maintain a similar texture while offering different flavors.
Alternatively, you can skip the creamy layer entirely and make a two-layer jelly cake with just fruit and juice. The beauty of Agar Jelly Fruit Cake is its adaptability. You can customize it to dietary preferences, flavor profiles, or even color themes.
How long can I store Agar Jelly Fruit Cake?
Agar Jelly Fruit Cake is best eaten within 2 to 3 days of making it. Store the cake in an airtight container in the refrigerator to keep it fresh. The cake will maintain its firmness thanks to the agar, but after a few days, some fruits may start to release water or lose texture.
While agar doesn’t melt like gelatin, refrigeration helps maintain its crisp bite and refreshing taste. Avoid freezing the cake, as this can affect the texture and cause separation between layers.
Why didn’t my Agar Jelly Fruit Cake set properly?
If your Agar Jelly Fruit Cake didn’t set firmly, the most likely cause is either not boiling the agar agar mixture long enough or not using the correct amount of agar agar powder. Agar must be boiled for at least one full minute to activate its gelling properties. Stir continuously and ensure it’s fully dissolved in the liquid before pouring.
Also, be sure to measure your ingredients accurately. Using less agar than required can result in a jelly that doesn’t hold its shape. If the cake is too soft or wobbly, try adding a little more agar in your next batch for a firmer texture.
What is the best fruit to use in Agar Jelly Fruit Cake?
The best fruits for Agar Jelly Fruit Cake are those that hold their shape and offer a variety of colors and textures. Great choices include mango, kiwi, pineapple, papaya, lychee, and blueberries. These fruits not only provide beautiful color contrast when suspended in the jelly but also complement the light, refreshing nature of the dessert.
Avoid overly watery fruits like watermelon, or fruits that brown easily like bananas or apples. Stick with firm, fresh tropical fruits or canned options like lychee to keep your Agar Jelly Fruit Cake both tasty and visually appealing.


Appreciating the persistence you put into your blog and detailed information you offer. It’s good to come across a blog every once in a while that isn’t the same unwanted rehashed material. Great read! I’ve saved your site and I’m adding your RSS feeds to my Google account.
Regards for this post, I am a big fan of this web site would like to go along updated.
I’ve been browsing online greater than 3 hours these days, but I never discovered any fascinating article like yours. It is lovely value sufficient for me. In my view, if all site owners and bloggers made just right content as you probably did, the web will be a lot more helpful than ever before. “It’s all right to have butterflies in your stomach. Just get them to fly in formation.” by Dr. Rob Gilbert.