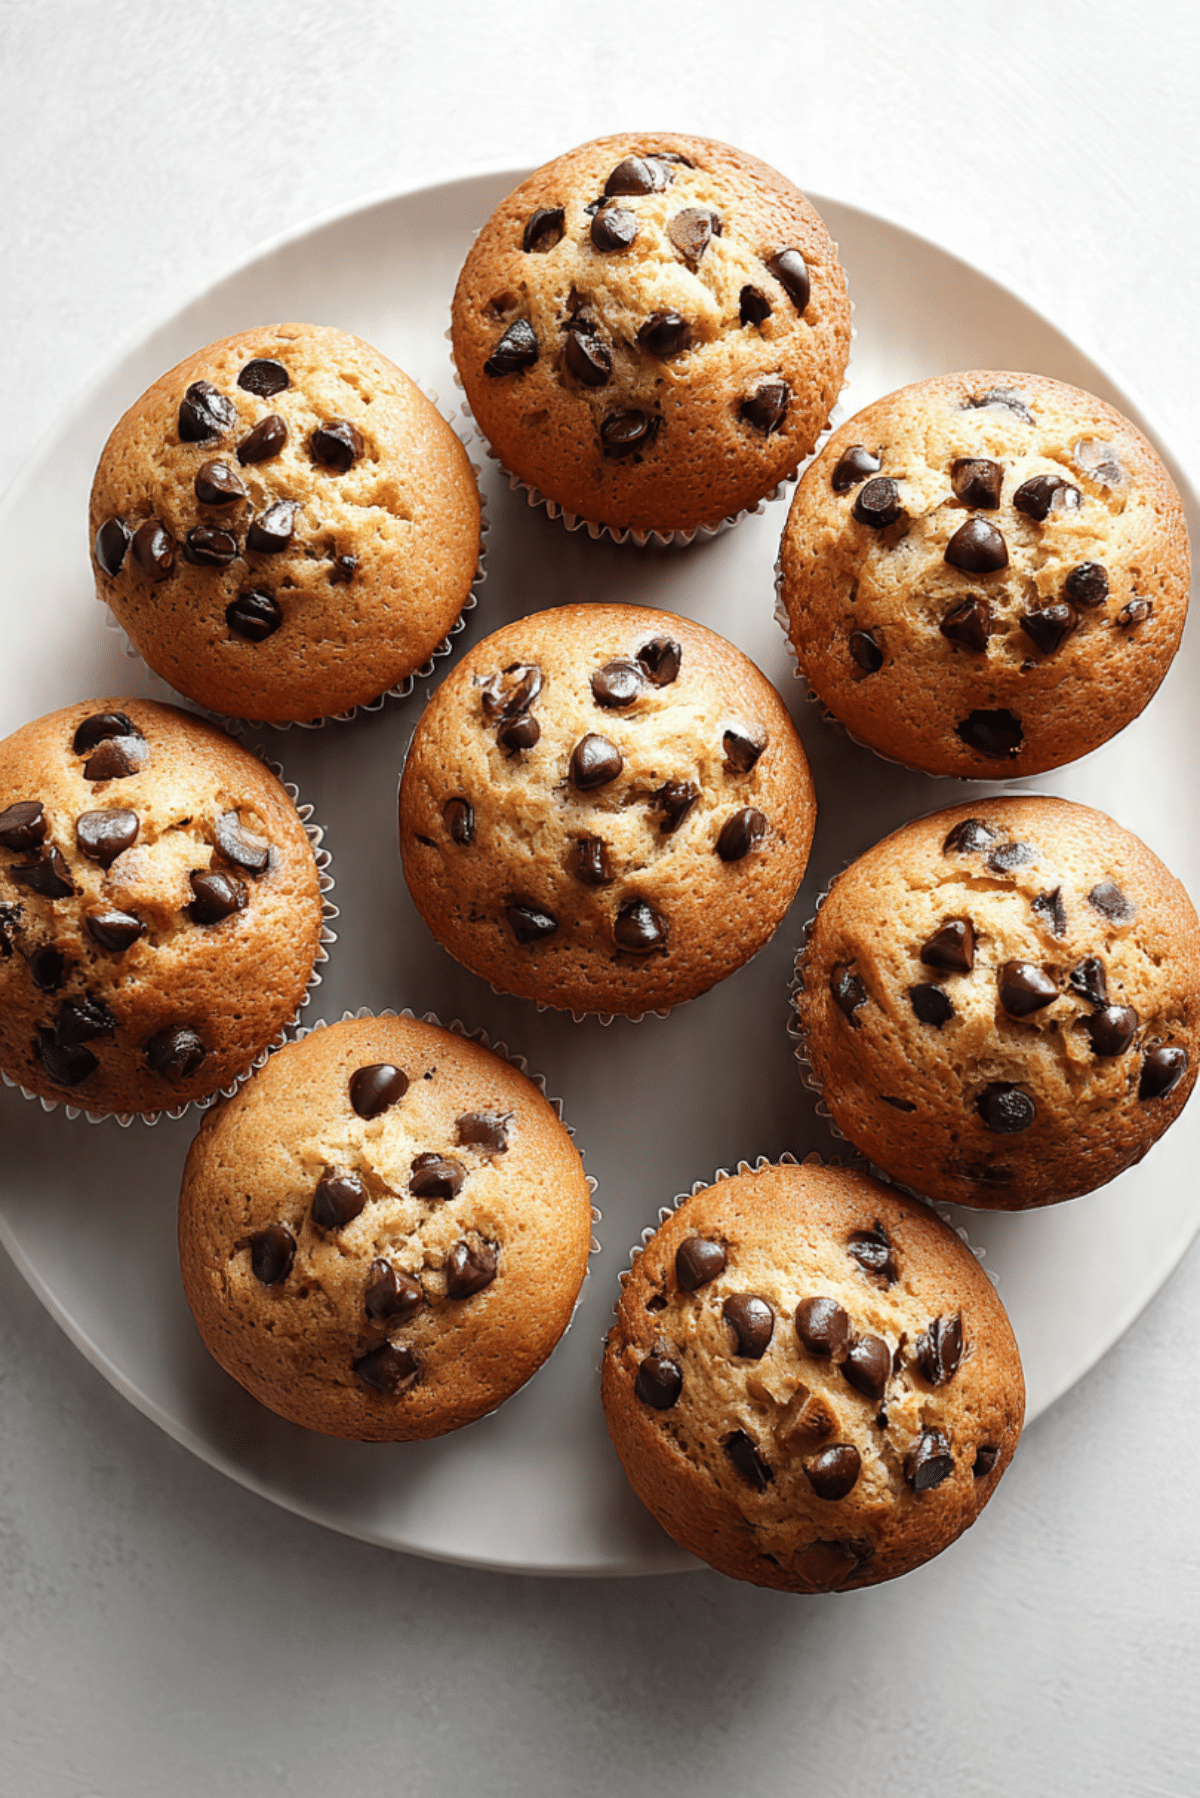
Chocolate Chip Muffins
There is something so comforting about pulling a tray of warm muffins from the oven, especially when the tops are golden, the centers are tender, and little pockets of chocolate are still soft and melty. These muffins are the kind you make once and then keep coming back to, because they feel just right for slow mornings, lunchbox treats, or that late afternoon moment when only something homemade will do.
And now that we have that cozy picture in mind, let’s dive into what makes this batch such a favorite. Trust me, you’re going to love this.
Why These Bakery-Style Muffins Always Hit the Spot
Some baked goods look good but fall flat once you take a bite. Not these. They rise beautifully, stay soft inside, and have that rich buttery flavor that makes each bite feel a little special. The chocolate chips melt into the crumb just enough to make every muffin taste indulgent without being too heavy.
What really makes them shine is the balance. The tops have a light golden finish, the inside stays moist and fluffy, and the sweetness never feels over the top. This one’s a total game-changer when you want something easy, reliable, and genuinely delicious.
A Little Muffin Story Worth Knowing
Muffins have long been a beloved part of home baking, especially in American kitchens where quick breads became popular for their simplicity and comforting texture. Unlike yeast breads, muffins rely on baking powder and baking soda for lift, which means you can mix them up and bake them right away without waiting around.
Over the years, chocolate chip versions became a household favorite because they bring together two things people rarely say no to, soft breakfast bakes and melted chocolate. Let me tell you, it’s worth every bite, and it is easy to see why these became such a classic.
Why This Recipe Earns a Permanent Spot in Your Kitchen
Before we get into the details, it helps to know why this version works so well every single time. It is one of those dependable recipes that feels flexible and friendly, even on a busy day.
Versatile: These muffins work for breakfast, brunch, snacks, and dessert. You can serve them warm from the oven or pack them up for later and they still taste wonderful.
Budget-Friendly: The ingredients are mostly pantry and fridge staples, which means no complicated shopping trip is needed. You get a bakery-style result without spending bakery prices.
Quick and Easy: The batter comes together in a short time and the method is simple enough for beginner bakers. No mixer is required, which makes cleanup easier too.
Customizable: You can swap the chocolate chips, add nuts if you like, or adjust the flavor with a little cinnamon or orange zest. It is easy to make the batch feel like your own.
Crowd-Pleasing: Most people light up when they see a basket of warm muffins on the table. They are familiar, comforting, and always welcome.
Make-Ahead Friendly: You can bake them ahead for the week and store them easily. They hold up well and still taste tender the next day.
Great for Leftovers: A leftover muffin can become part of breakfast with fruit and yogurt, or a sweet little afternoon treat with milk or tea. Nothing goes to waste here.
Smart Baker Secrets for Better Results
Now let’s talk about the little details that help good muffins become really great muffins. These are the kinds of small tricks that make a big difference.
- Use room temperature eggs, milk, and sour cream so the batter mixes smoothly and bakes more evenly.
- Do not overmix the batter once the dry ingredients go in. A few small lumps are perfectly fine and actually help keep the crumb tender.
- Toss the chocolate chips with a teaspoon of flour before folding them in if you want to help prevent sinking.
- Fill the muffin cups generously, about three quarters full, so you get those nice domed tops.
- Let the muffins rest in the pan for a few minutes before moving them, which helps them set without drying out.
The Kitchen Tools That Make It Easy
Before the mixing starts, it helps to have a few simple tools ready so the process feels smooth from beginning to end.
Mixing bowls: You will need one for the dry ingredients and one for the wet ingredients so everything combines evenly.
Whisk: A whisk helps blend the dry mixture and smooth out the wet ingredients without overworking the batter.
Spatula: This is the best tool for gently folding everything together and keeping the texture light.
12-cup muffin pan: A standard muffin pan gives the batter structure and helps create an even bake.
Paper liners or nonstick spray: These make removal easy and help keep the muffins neat and tender.
Measuring cups and spoons: Accurate measuring matters in baking, especially for flour and leavening agents.
Everything That Goes Into These Soft, Chocolatey Muffins
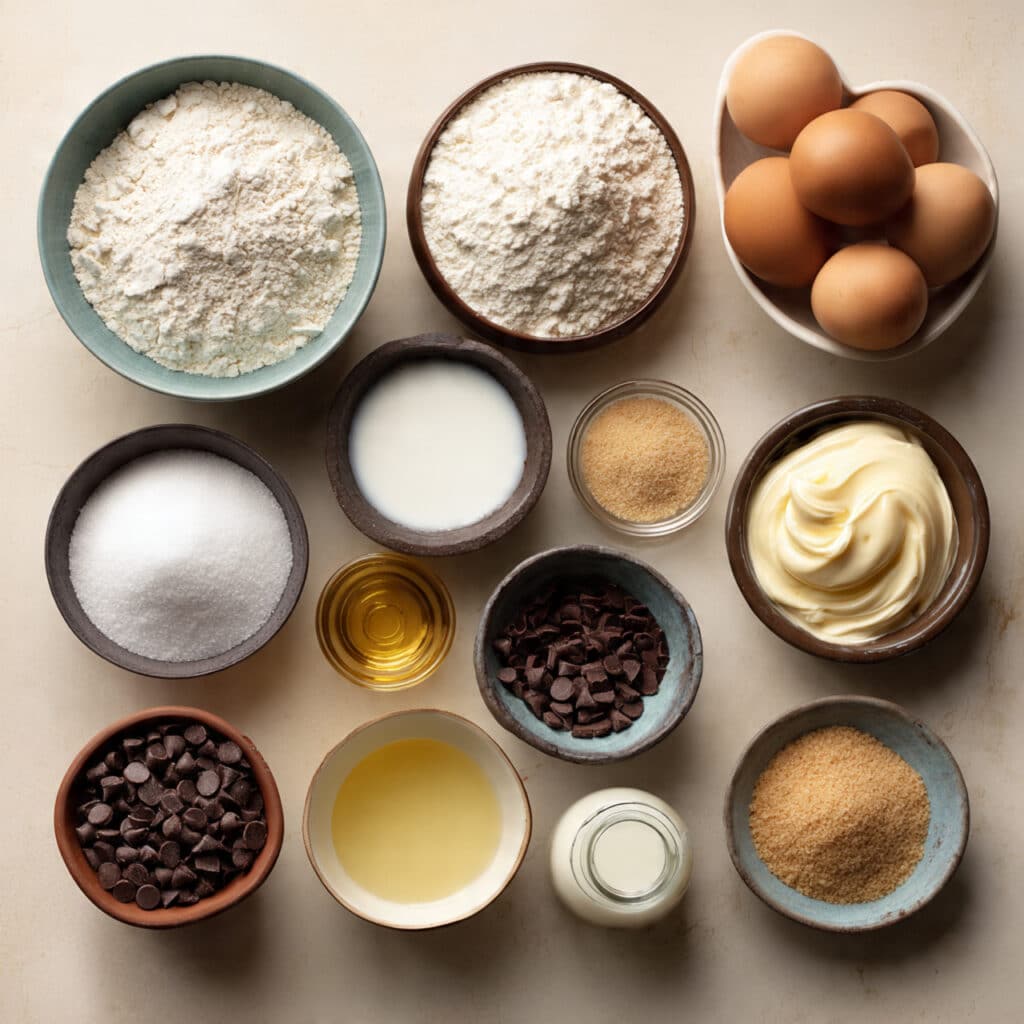
Now that the prep is out of the way, here are the ingredients that come together to create that fluffy crumb, rich flavor, and irresistible chocolate finish.
- All-purpose flour: 2 cups, it gives the muffins structure while still keeping them soft.
- Baking powder: 2 teaspoons, this helps the muffins rise tall and light.
- Baking soda: 1/2 teaspoon, it works with the sour cream to create extra lift and tenderness.
- Salt: 1/2 teaspoon, it balances the sweetness and makes the chocolate flavor pop.
- Granulated sugar: 1/2 cup, this adds clean sweetness and helps with a soft texture.
- Light brown sugar: 1/4 cup, it brings a deeper caramel note and extra moisture.
- Large eggs: 2, they bind the batter and support the rise.
- Whole milk: 1/2 cup, it loosens the batter and keeps the crumb delicate.
- Sour cream: 1/2 cup, it adds richness and keeps the muffins moist.
- Unsalted butter, melted: 1/2 cup, this gives the batter buttery flavor and a tender bite.
- Vanilla extract: 2 teaspoons, it rounds out the sweetness and gives warmth to the overall flavor.
- Semi-sweet chocolate chips: 1 1/4 cups, these melt into little pockets of chocolate throughout the muffins.
Easy Swaps When You Need Them
One of the best things about a dependable muffin recipe is how easy it is to adapt. And now let’s dive into a few simple substitutions that still keep the results delicious.
All-purpose flour: Use a good 1:1 gluten-free baking flour if needed.
Whole milk: Use 2 percent milk or plain unsweetened dairy-free milk.
Sour cream: Plain Greek yogurt works beautifully as a substitute.
Unsalted butter: Use neutral oil for a slightly different but still moist texture.
Semi-sweet chocolate chips: Try dark chocolate chips or mini chocolate chips for a fun twist.
The Star Ingredients That Do the Heavy Lifting
Some ingredients quietly hold the whole recipe together, and these two really deserve a little spotlight.
Sour cream: This is the secret to that soft, tender texture. It gives the muffins a gentle richness and helps them stay moist even after they cool.
Semi-sweet chocolate chips: These bring the sweet, melty pockets that make every bite exciting. They balance nicely with the buttery batter so the flavor feels rich, not overwhelming.
Let’s Bake a Batch Step by Step
This is the part where everything starts to smell amazing. The process is simple, cozy, and very satisfying, especially when the batter comes together thick and glossy.
- Preheat Your Equipment: Preheat your oven to 375°F and line a 12-cup muffin pan with paper liners or lightly grease the cups.
- Combine Ingredients: In a large bowl, whisk together the flour, baking powder, baking soda, salt, granulated sugar, and brown sugar. In another bowl, whisk the eggs, milk, sour cream, melted butter, and vanilla until smooth.
- Prepare Your Cooking Vessel: Make sure the muffin pan is ready before the batter is fully mixed so you can bake right away for the best rise.
- Assemble the Dish: Pour the wet ingredients into the dry ingredients and gently fold until just combined. Stir in the chocolate chips, saving a small handful for the tops if you like.
- Cook to Perfection: Divide the batter evenly among the muffin cups, filling each about three quarters full. Sprinkle the remaining chocolate chips on top, then bake for 18 to 20 minutes, or until the tops are golden and a toothpick inserted near the center comes out with a few moist crumbs.
- Finishing Touches: Let the muffins cool in the pan for 5 minutes, then transfer them to a wire rack. This helps the structure set while keeping the inside soft.
- Serve and Enjoy: Serve warm for the dreamiest melted chocolate texture, or let them cool completely and store for later.
What Makes the Texture and Flavor So Good
As they bake, the batter puffs into soft domes with lightly golden edges and a tender, fluffy center. The combination of butter, milk, and sour cream creates a rich crumb that feels moist without being heavy, and the chocolate chips melt into little ribbons of sweetness throughout.
What I love most is how the flavor develops from bite to bite. First you get the warm vanilla and buttery base, then the deeper sweetness from the brown sugar, and finally that soft burst of chocolate. It is simple, yes, but never boring.
Helpful Tips for Muffin Success
By this point, you are already close to a perfect batch, but a few extra reminders can make the process even smoother.
- Measure flour carefully: Spoon it into the measuring cup and level it off so the muffins do not turn out dense.
- Use fresh leavening agents: Baking powder and baking soda lose strength over time, so fresh ones give the best lift.
- Reserve a few chocolate chips for the top: This makes the muffins look extra inviting and gives that bakery-style finish.
- Cool just enough before eating: A few minutes of cooling helps the crumb set while still keeping the chocolate soft and melty.
What to Avoid for the Best Batch
Even easy recipes have a few places where things can go off track, so here are the common trouble spots to watch for.
- Overmixing the batter: This can make the muffins tough instead of tender. Stir only until the flour disappears.
- Overbaking: Too much time in the oven dries them out. Check a minute or two early if your oven runs hot.
- Filling the cups unevenly: Uneven portions can lead to mixed results, with some muffins underbaked and others too dark.
- Skipping the cooling rest: Removing them too soon can make them fall apart, especially while still very hot.
Nutrition Facts You Can Expect
Here is a quick look at the approximate nutrition for this batch, which is helpful if you are planning servings ahead.
Servings: 12 muffins
Calories per serving: 245
Note: These are approximate values.
Time Breakdown Before You Start
And now let’s keep things practical with the timing, because this is one of those bakes that feels very manageable even on a full day.
Prep Time: 15 minutes
Cook Time: 20 minutes
Total Time: 35 minutes
Make-Ahead and Storage Tips That Really Help
If you like to bake ahead, these muffins are a great choice. You can mix the dry ingredients the night before and keep them covered, then whisk the wet ingredients together the next day and combine everything right before baking.
Once baked, store the muffins in an airtight container at room temperature for up to 3 days. For longer storage, refrigerate them for up to 5 days, though they are best when brought back to room temperature or warmed slightly before serving. You can also freeze them for up to 2 months. Wrap each one well, then thaw at room temperature or warm gently in the microwave for about 15 to 20 seconds.
How to Serve Them So They Shine
These muffins are lovely all on their own, but there are so many cozy ways to serve them. Pair one with coffee, tea, or a glass of cold milk for a classic treat. Add fruit on the side for breakfast, or serve them on a brunch board with yogurt and berries for something a little more special.
For dessert, warm one slightly and let the chocolate soften again. It feels extra comforting that way, especially on a cool evening.
Creative Leftover Transformations
Leftover muffins rarely last long, but when they do, there are a few fun ways to use them. Crumble one over vanilla yogurt for a sweet breakfast parfait, or slice it in half and toast it lightly for a crisp edge and soft middle.
You can also cube the muffins and use them in a dessert-style bread pudding with a simple vanilla custard. The chocolate melts into the base and turns something humble into a really lovely treat.
Additional Tips to Keep in Mind
Sometimes it is the tiny details that make baking feel easier and more enjoyable, so here are a few extra things worth remembering.
A cookie scoop makes dividing the batter quick and neat. Let the melted butter cool slightly before adding it to the wet mixture so it blends smoothly. And if you want a slightly prettier top, press a few extra chocolate chips onto each muffin right before baking.
Make It a Showstopper
Presentation may be simple here, but it still matters. Let the muffins cool on a rack until just barely warm, then arrange them on a white plate or rustic wooden board so the golden tops and glossy chocolate chips stand out.
A light dusting of powdered sugar is optional, but even without it, these look beautiful when stacked casually and served fresh. The domed tops, rich color, and melty chips do most of the work for you.
Variations to Try
Once you make the original version, it is hard not to start dreaming up other spins. Here are a few worth trying.
- Mini Chocolate Chip Muffins: Use a mini muffin tin and reduce the baking time for bite-sized treats that are perfect for snacks.
- Double Chocolate Version: Replace 1/4 cup of the flour with unsweetened cocoa powder for a richer, more dessert-like muffin.
- Orange Chocolate Twist: Add 1 teaspoon of finely grated orange zest to the wet ingredients for a bright citrus note.
- Chocolate Chip Walnut Muffins: Fold in 1/2 cup chopped walnuts for added crunch and a nutty finish.
- Greek Yogurt Style: Replace the sour cream with plain Greek yogurt for a slightly tangier flavor and equally tender crumb.
FAQ’s
Q1: Can I use mini chocolate chips instead of regular ones?
Yes, absolutely. Mini chips distribute more evenly through the batter, so you get a little chocolate in almost every bite.
Q2: Why are my muffins dense instead of fluffy?
This usually happens when the batter is overmixed or the flour is measured too heavily. Gentle mixing and accurate measuring make a big difference.
Q3: Can I make these ahead for the week?
Yes. Bake them, cool them completely, and store them in an airtight container so they stay soft and ready to grab.
Q4: Can I freeze them after baking?
Yes, they freeze very well. Wrap them individually and store them in a freezer-safe bag or container for up to 2 months.
Q5: What is the best way to reheat one?
A quick 15 to 20 seconds in the microwave works well. It warms the center and softens the chocolate nicely.
Q6: Can I use yogurt instead of sour cream?
Yes, plain Greek yogurt is a great substitute and keeps the muffins moist and tender.
Q7: How full should I fill the muffin cups?
About three quarters full is ideal. That gives you a nice rise without spilling over.
Q8: Can I make this batter the night before?
It is better to bake the batter soon after mixing so the leavening stays active. You can prep the dry and wet ingredients separately ahead of time instead.
Q9: How do I know when they are done?
The tops should be lightly golden and a toothpick inserted near the center should come out with a few moist crumbs, not wet batter.
Q10: Can I add other mix-ins?
Yes, as long as you do not overload the batter. Chopped walnuts or a little orange zest work especially well.
Conclusion
Warm, soft, and packed with melty chocolate, these muffins are the kind of homemade treat that makes an ordinary day feel a little sweeter. They are easy enough for a casual weekday bake, but delicious enough to share with people you really want to impress. Trust me, once you smell them in the oven, you will already be planning the next batch.
Print
Chocolate Chip Muffins
- Prep Time: 15 minutes
- Cook Time: 20 minutes
- Total Time: 35 minutes
- Yield: 12 muffins 1x
- Category: Breakfast
- Method: Baking
- Cuisine: American
- Diet: Vegetarian
Description
Soft, fluffy chocolate chip muffins with tender crumb, buttery vanilla flavor, and melty pockets of semi-sweet chocolate in every bite.
Ingredients
- 2 cups all-purpose flour
- 2 teaspoons baking powder
- 1/2 teaspoon baking soda
- 1/2 teaspoon salt
- 1/2 cup granulated sugar
- 1/4 cup light brown sugar
- 2 large eggs
- 1/2 cup whole milk
- 1/2 cup sour cream
- 1/2 cup unsalted butter, melted
- 2 teaspoons vanilla extract
- 1 1/4 cups semi-sweet chocolate chips
Instructions
- Preheat the oven to 375°F and line a 12-cup muffin pan with paper liners or lightly grease the cups.
- In a large bowl, whisk together the flour, baking powder, baking soda, salt, granulated sugar, and brown sugar.
- In a separate bowl, whisk together the eggs, milk, sour cream, melted butter, and vanilla extract until smooth.
- Pour the wet ingredients into the dry ingredients and fold gently until just combined.
- Stir in the chocolate chips, reserving a small handful for topping if desired.
- Divide the batter evenly among the muffin cups, filling each about three quarters full.
- Top with the reserved chocolate chips and bake for 18 to 20 minutes, or until the tops are golden and a toothpick inserted near the center comes out with a few moist crumbs.
- Cool in the pan for 5 minutes, then transfer to a wire rack and serve warm or at room temperature.
Notes
- Do not overmix the batter or the muffins may turn dense.
- Measure the flour carefully by spooning it into the measuring cup and leveling it off.
- Plain Greek yogurt can be used instead of sour cream.
- Store in an airtight container at room temperature for up to 3 days or freeze for up to 2 months.
Nutrition
- Serving Size: 1 muffin
- Calories: 245
- Sugar: 17g
- Sodium: 170mg
- Fat: 11g
- Saturated Fat: 6g
- Unsaturated Fat: 4g
- Trans Fat: 0g
- Carbohydrates: 33g
- Fiber: 1g
- Protein: 4g
- Cholesterol: 48mg
Keywords: chocolate chip muffins, bakery style muffins, homemade muffins, easy muffin recipe, soft chocolate muffins