Vegan Thai Tea Butter Mochi
There is something incredibly comforting about the chewy bite of butter mochi, especially when it’s infused with the deep caramel aroma of Thai tea. The moment these golden squares come out of the oven, the kitchen fills with a warm scent that feels both nostalgic and exciting. The edges turn lightly crisp while the center stays soft, rich, and satisfyingly chewy. Trust me, you’re going to love this.
What makes this dessert even more special is the way the Thai tea flavor blends into the coconut milk and glutinous rice flour, creating layers of sweetness and creaminess in every bite. It’s the kind of treat that disappears fast from the table because everyone keeps reaching for “just one more.”
A Cozy Dessert That Feels Like Pure Comfort
Some desserts are fancy and complicated, while others instantly make you feel at home. This one belongs in the second category. Vegan Thai Tea Butter Mochi has that perfect balance between a soft cake and chewy mochi texture, which makes every square incredibly satisfying.
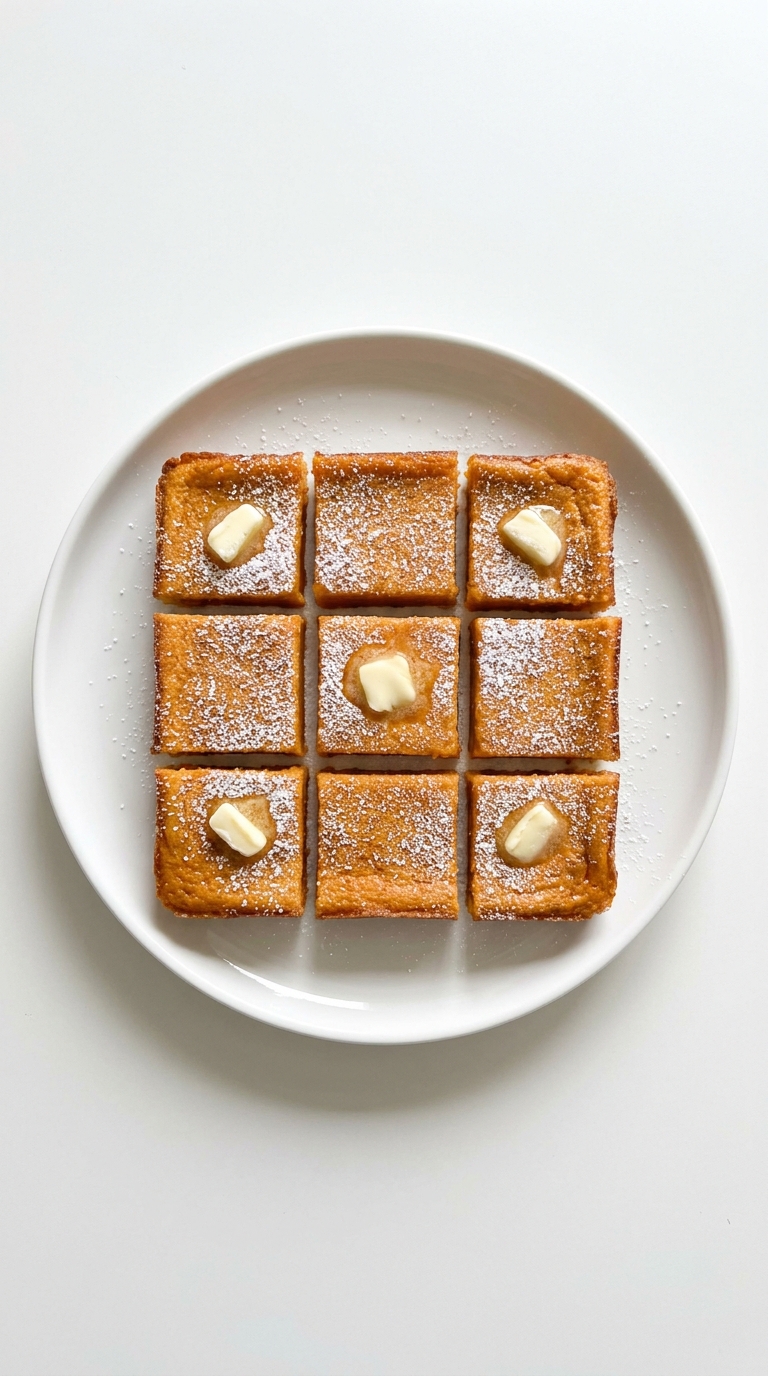
The golden orange color gives it such a beautiful bakery-style appearance, and the coconut milk adds a creamy richness that keeps the inside moist and tender. As you bite into it, you get notes of vanilla, sweet tea, caramel, and toasted edges all at once. Let me tell you, it’s worth every bite.
And now that the flavors already have you curious, let’s dive a little deeper into where this delightful dessert comes from.
The Sweet Story Behind This Chewy Favorite
Butter mochi has roots in Hawaiian cuisine, where Japanese mochi traditions blended beautifully with local baking influences. Traditional versions often include butter, milk, and eggs, creating a rich chewy dessert bar loved across Hawaii.
This vegan twist keeps the same beloved texture while introducing Thai tea, which brings a bold and fragrant personality to the dessert. Thai tea itself is known for its vibrant color and creamy flavor profile, often served iced with sweetened milk. Combining it with butter mochi creates a fusion dessert that feels modern while still honoring both culinary inspirations.
Desserts like this are a reminder that food cultures constantly evolve, and honestly, this version is a total game-changer.
Why This Recipe Deserves a Spot in Your Kitchen
Once you make this recipe, it’s easy to see why people become obsessed with it. The texture alone is unforgettable, but there are plenty of other reasons to keep this recipe on repeat.
Versatile: You can serve it warm, chilled, or even slightly toasted the next day. It works beautifully as dessert, a sweet snack, or even with afternoon tea.
Budget-Friendly: Most of the ingredients are pantry staples or easy-to-find grocery items, which makes this recipe affordable without sacrificing flavor.
Quick and Easy: The batter comes together in one bowl with simple mixing steps, making it perfect for beginner bakers.
Customizable: You can adjust the sweetness, add toppings, or experiment with flavors like pandan or ube.
Crowd-Pleasing: The chewy texture and sweet tea flavor make it stand out at parties and potlucks.
Make-Ahead Friendly: This dessert holds its texture wonderfully for days, which means you can bake it ahead without stress.
Great for Leftovers: Leftover squares stay delicious and chewy, and they reheat beautifully.
Chef Secrets for the Best Mochi Texture
Getting the perfect butter mochi texture is easier than you think, especially with a few insider tricks.
- Use glutinous rice flour only, because regular rice flour will not create the signature chewy texture.
- Let the Thai tea steep fully so the flavor becomes deep and aromatic.
- Whisk the batter until completely smooth to avoid uneven texture.
- Slightly grease the baking pan for crisp golden edges that release easily.
- Allow the mochi to cool before slicing so the squares hold their shape properly.
Helpful Kitchen Tools for Stress-Free Baking
Before starting, gathering the right tools makes the process feel smooth and enjoyable.
Mixing Bowl: A large bowl gives you enough space to whisk the batter evenly.
Whisk: Essential for creating a smooth lump-free batter.
Tea Strainer: Helps remove tea leaves cleanly after steeping.
8×8 Baking Pan: Creates thick, perfectly chewy mochi squares.
Parchment Paper: Makes cleanup easier and helps lift the mochi out cleanly.
Sharp Knife: Important for neat slices once the dessert cools.
Everything You’ll Need for This Chewy Dessert
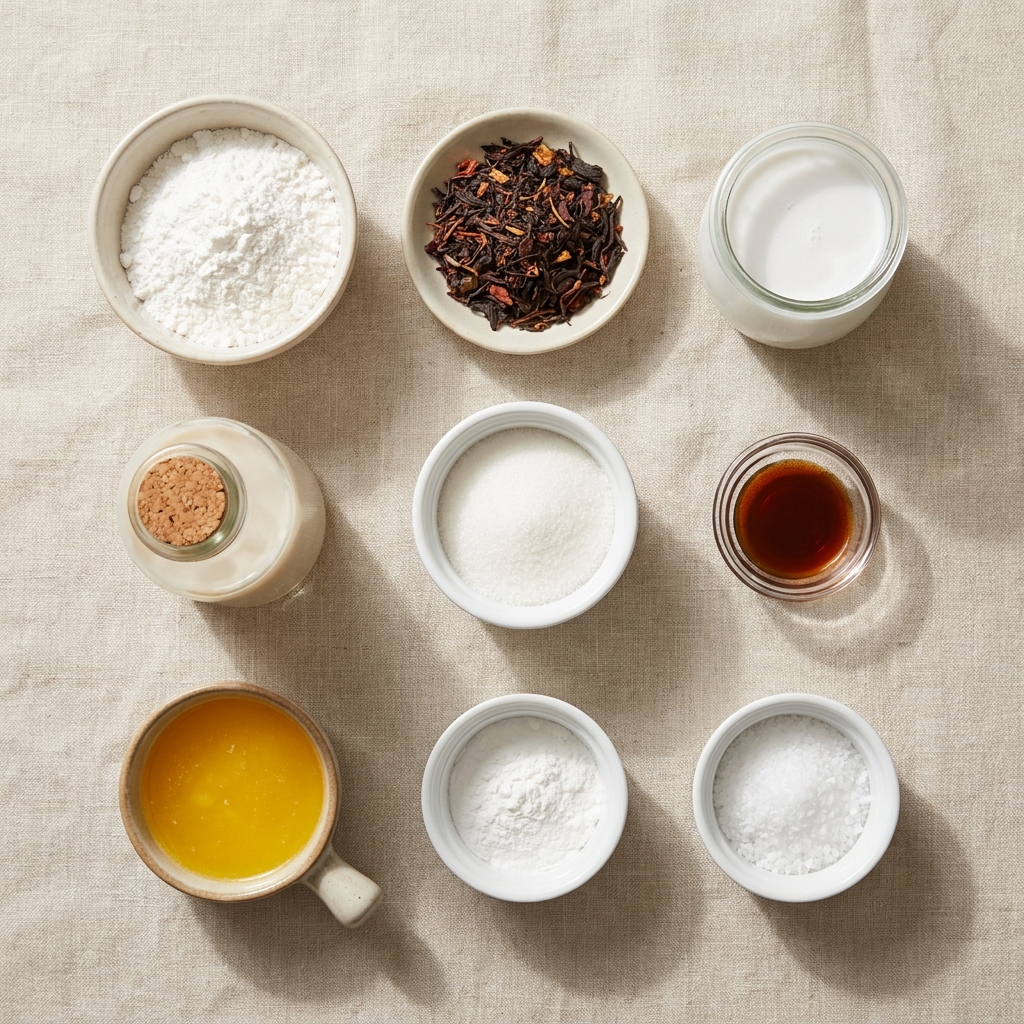
The beauty of this recipe comes from simple ingredients working together to create something unforgettable. Every ingredient has an important role, from the chewy structure to the creamy richness.
- Glutinous Rice Flour: 2 cups, creates the signature chewy mochi texture.
- Thai Tea Leaves: 3 tablespoons, infuses the dessert with rich tea flavor and warm color.
- Full Fat Coconut Milk: 1 can (13.5 ounces), adds creamy richness and moisture.
- Unsweetened Almond Milk: 1 cup, keeps the batter smooth and dairy free.
- Granulated Sugar: 1 cup, balances the bold tea flavor with sweetness.
- Vanilla Extract: 2 teaspoons, enhances warmth and aroma.
- Melted Vegan Butter: 1/2 cup, adds richness and helps create golden edges.
- Baking Powder: 2 teaspoons, gives a slight lift while keeping the center chewy.
- Salt: 1/2 teaspoon, balances sweetness and deepens flavor.
Easy Ingredient Swaps You Can Try
One of the best things about this recipe is how flexible it can be depending on what you already have in your kitchen.
Almond Milk: Oat milk or soy milk work beautifully here.
Granulated Sugar: Coconut sugar adds a deeper caramel flavor.
Vanilla Extract: Almond extract gives a slightly nuttier aroma.
Vegan Butter: Refined coconut oil can replace it for a richer coconut taste.
Spotlight on the Ingredients That Make This Recipe Shine
Some ingredients completely transform a recipe, and these two are definitely the stars here.
Thai Tea Leaves: Their bold flavor creates the dessert’s signature caramel-like aroma and beautiful orange hue.
Glutinous Rice Flour: This ingredient is what gives mochi its unforgettable chewy texture that keeps people coming back for another square.
Let’s Bake This Delicious Treat Together
The process is simple, relaxing, and honestly pretty fun. Once the batter is mixed, the oven does most of the work for you.
- Preheat Your Equipment: Preheat your oven to 350°F and lightly grease an 8×8 baking pan with vegan butter or line it with parchment paper.
- Combine Ingredients: Heat the almond milk until warm, then steep the Thai tea leaves for 10 minutes. Strain and let cool slightly. In a large bowl, whisk together glutinous rice flour, sugar, baking powder, and salt. Add coconut milk, steeped tea, vanilla extract, and melted vegan butter. Whisk until smooth.
- Prepare Your Cooking Vessel: Pour the batter into the prepared baking pan and gently tap the pan on the counter to release air bubbles.
- Assemble the Dish: Smooth the surface evenly with a spatula so the mochi bakes uniformly.
- Cook to Perfection: Bake for 55 minutes until the top is golden brown and the edges are lightly crisp.
- Finishing Touches: Let the mochi cool completely before slicing into squares. This helps the texture settle beautifully.
- Serve and Enjoy: Serve slightly warm or at room temperature for the ultimate chewy experience.
The Magic of Texture and Flavor in Every Bite
One of the best parts about this dessert is the contrast between textures. The edges become lightly crisp and caramelized while the center stays dense, soft, and satisfyingly chewy.
As it bakes, the Thai tea flavor deepens into something warm and almost buttery, even without dairy. The coconut milk rounds everything out with creamy sweetness, while vanilla adds that cozy bakery aroma. Every bite feels rich without becoming heavy.
Smart Baking Tips for Foolproof Results
Even simple recipes become amazing with a few extra tricks.
- Let the batter rest for 5 minutes before baking for a smoother texture.
- Use full fat coconut milk for the richest flavor and best consistency.
- Slightly wet your knife before slicing to create cleaner cuts.
- Allow the mochi to cool fully for the chewiest texture.
Mistakes to Skip for the Perfect Batch
A few small mistakes can affect the texture, but they’re easy to avoid.
- Avoid overbaking, because the center can become too firm instead of chewy.
- Do not use regular rice flour, since it changes the entire texture.
- Avoid slicing while hot, because the bars may fall apart.
- Do not skip greasing the pan, or the mochi may stick badly.
Nutrition Snapshot
Servings: 9
Calories per serving: 310
Note: These are approximate values.
Timing Your Baking Session
Prep Time: 15 minutes
Cook Time: 55 minutes
Total Time: 1 hour 10 minutes
How to Store and Make Ahead Like a Pro
This dessert is surprisingly easy to prepare ahead, which makes it perfect for gatherings or meal prep.
Store leftovers in an airtight container at room temperature for up to 2 days, or refrigerate for up to 5 days. To reheat, microwave a square for about 10 seconds to bring back the soft chewy texture.
You can also freeze individual slices wrapped tightly in plastic wrap. Thaw overnight in the refrigerator before serving.
The Best Ways to Serve These Chewy Squares
These mochi bars are incredibly satisfying on their own, but there are so many fun serving ideas too.
Serve them slightly warm with hot tea or iced Thai tea for a cozy pairing. A dusting of powdered sugar also looks beautiful on top. For a richer dessert moment, add a scoop of dairy free vanilla ice cream on the side.
Fun Ideas for Leftovers
Leftovers never feel boring with this recipe because the texture stays amazing.
Cut leftover squares into smaller cubes for dessert platters. You can also lightly toast slices in a pan for crisp edges and warm centers. Some people even enjoy them chilled straight from the fridge for an extra chewy bite.
Extra Little Tricks That Make a Big Difference
A few small details can make this dessert even better.
Use high quality Thai tea leaves for the richest flavor and color. If you want extra visual appeal, brush the top lightly with melted vegan butter after baking for a glossy finish.
For cleaner slices, chill the mochi for 20 minutes before cutting.
Turn This Dessert Into a Bakery-Worthy Showstopper
Presentation can make homemade desserts feel extra special.
Arrange the squares neatly on a white serving plate and dust lightly with powdered sugar. Garnish with a tiny sprinkle of tea powder for a subtle elegant touch. The rich orange color already looks stunning, so keeping the presentation simple really lets it shine.
Creative Variations Worth Trying
Once you master the base recipe, there are so many delicious directions to explore.
- Add toasted coconut flakes for extra texture and tropical flavor.
- Mix in black sesame seeds for a nutty contrast.
- Swirl in pandan extract for a green vanilla-like aroma.
- Add dairy free white chocolate chips for extra sweetness.
- Top with crushed roasted peanuts for a salty crunch.
FAQ’s
Q1: Can I use regular flour instead of glutinous rice flour?
No, the chewy mochi texture depends entirely on glutinous rice flour.
Q2: Does this dessert taste strongly like tea?
The Thai tea flavor is noticeable but balanced with sweetness and coconut milk.
Q3: Can I make this less sweet?
Yes, you can slightly reduce the sugar without affecting the texture too much.
Q4: Why is my mochi too dense?
Overmixing or overbaking can make the texture heavier than intended.
Q5: Can I freeze butter mochi?
Absolutely. Wrap slices tightly and freeze for up to 2 months.
Q6: What does butter mochi taste like?
It tastes rich, chewy, slightly buttery, and lightly sweet with caramelized edges.
Q7: Can I use tea bags instead of loose tea?
Yes, strong Thai tea bags can work if loose leaves are unavailable.
Q8: How do I know it’s fully baked?
The top should be golden and the center should look set but still slightly soft.
Q9: Is this dessert gluten free?
Yes, glutinous rice flour is naturally gluten free despite its name.
Q10: Can I serve this chilled?
Definitely. Chilled mochi becomes even chewier and more satisfying.
Conclusion
Vegan Thai Tea Butter Mochi is the kind of dessert that surprises people in the best possible way. It’s chewy, rich, fragrant, and beautifully golden with every slice packed full of cozy flavor. Whether you serve it warm with tea or chilled straight from the fridge, this dessert has a way of making every bite memorable. Trust me, once you try it, you’ll already be planning your next batch.
Print
Vegan Thai Tea Butter Mochi
- Prep Time: 15 minutes
- Cook Time: 55 minutes
- Total Time: 1 hour 10 minutes
- Yield: 9 squares 1x
- Category: Dessert
- Method: Baking
- Cuisine: Hawaiian Fusion
- Diet: Vegan
Description
Chewy, rich, and infused with bold Thai tea flavor, this Vegan Thai Tea Butter Mochi combines creamy coconut milk with glutinous rice flour for a soft and satisfying dessert with crisp golden edges.
Ingredients
- 2 cups glutinous rice flour
- 3 tablespoons Thai tea leaves
- 1 can (13.5 ounces) full fat coconut milk
- 1 cup unsweetened almond milk
- 1 cup granulated sugar
- 2 teaspoons vanilla extract
- 1/2 cup melted vegan butter
- 2 teaspoons baking powder
- 1/2 teaspoon salt
Instructions
- Preheat oven to 350°F and grease an 8×8 baking pan or line with parchment paper.
- Warm the almond milk and steep the Thai tea leaves for 10 minutes. Strain and cool slightly.
- In a large bowl, whisk together glutinous rice flour, sugar, baking powder, and salt.
- Add coconut milk, steeped tea, vanilla extract, and melted vegan butter. Whisk until smooth.
- Pour the batter into the prepared baking pan and smooth the surface evenly.
- Bake for 55 minutes until the top is golden brown and the edges are lightly crisp.
- Cool completely before slicing into squares and serving.
Notes
- Use full fat coconut milk for the best texture and richness.
- Let the mochi cool completely before cutting for clean slices.
- Store leftovers in an airtight container for up to 5 days.
- Warm leftovers slightly before serving for a softer texture.
Nutrition
- Serving Size: 1 square
- Calories: 310
- Sugar: 22g
- Sodium: 180mg
- Fat: 12g
- Saturated Fat: 8g
- Unsaturated Fat: 3g
- Trans Fat: 0g
- Carbohydrates: 47g
- Fiber: 1g
- Protein: 3g
- Cholesterol: 0mg
Keywords: vegan butter mochi, thai tea dessert, chewy mochi bars, coconut milk dessert, baked mochi recipe